Few users are so annoyed that they are manually turning off their PC which isn’t recommended as it can damage your PC hardware. Well, I get it, it’s quite annoying to wait 15 minutes to shutdown your PC and frankly, this will frustrate anyone. But thankfully, there are quite a few methods by which this issue can be fixed in no time, so without wasting any time, let’s see how to Fix Windows 10 slow shutdown issue.
7 Ways To Fix Windows 10 Slow Shutdown
Make sure to create a restore point just in case something goes wrong.
7 Ways To Fix Windows 10 Slow Shutdown Method 1: Run System File Checker (SFC) and Check Disk (CHKDSK) Method 2: Run DISM (Deployment Image Servicing and Management) Method 3: Run CCleaner and Malwarebytes Method 4: Run System Maintenance Method 5: Perform a Clean Boot Method 6: Run Power Troubleshooter Method 7: Registry Fix
Method 1: Run System File Checker (SFC) and Check Disk (CHKDSK)
1.Press Windows Key + X then click on Command Prompt(Admin).
2.Now type the following in the cmd and hit enter:
3.Wait for the above process to finish and once done restart your PC. 4.Next, run CHKDSK from here Fix File System Errors with Check Disk Utility(CHKDSK). 5.Let the above process complete and again reboot your PC to save changes.
Method 2: Run DISM (Deployment Image Servicing and Management)
1.Press Windows Key + X then select Command Prompt(Admin).
2.Enter the following command in cmd and hit enter: Important: When you DISM you need to have Windows Installation Media ready. Note: Replace the C:\RepairSource\Windows with the location of your repair source
2.Press enter to run the above command and wait for the process to complete, usually, it takes 15-20 minutes. 3.After the DISM process if complete, type the following in the cmd and hit Enter: sfc /scannow 4.Let System File Checker run and once it’s complete, restart your PC. Check if the Windows 10 Slow Shutdown problem is resolved or not.
Method 3: Run CCleaner and Malwarebytes
Perform a Full antivirus scan to make sure your computer is secure. In addition to this run CCleaner and Malwarebytes Anti-malware. 1.Download and install CCleaner & Malwarebytes. 2.Run Malwarebytes and let it scan your system for harmful files. 3.If malware is found it will automatically remove them. 4.Now run CCleaner and in the “Cleaner” section, under the Windows tab, we suggest checking the following selections to be cleaned:
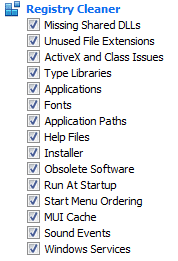
5.Once you’ve made certain the proper points are checked, simply click Run Cleaner, and let CCleaner run its course. 6.To clean your system further select the Registry tab and ensure the following are checked:
7.Select Scan for Issue and allow CCleaner to scan, then click Fix Selected Issues. 8.When CCleaner asks “Do you want backup changes to the registry?” select Yes. 9.Once your backup has completed, select Fix All Selected Issues. 10.Restart your PC to save changes. This would Fix Windows 10 Slow Shutdown but if it didn’t then continue to the next method.
Method 4: Run System Maintenance
1.Type Maintenance in Windows Search bar and click on “Security and Maintenance.“
2.Expand Maintenance section and click on Start maintenance.
3.Let System Maintenance run and reboot when the process is finished.
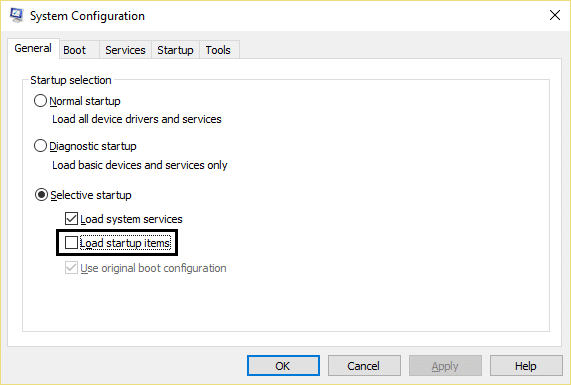
Method 5: Perform a Clean Boot
Sometimes 3rd party software can conflict with Windows Store and therefore, you should not be able to install any apps from Windows apps store. In order to Fix Windows 10 Slow Shutdown, you need to perform a clean boot in your PC and diagnose the issue step by step.
Method 6: Run Power Troubleshooter
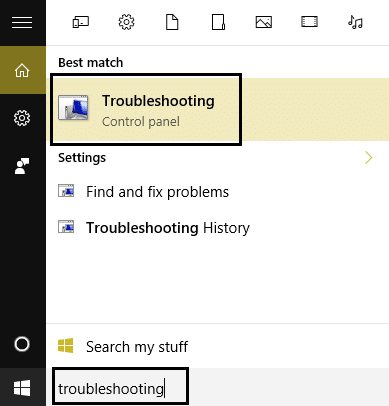
1.Type “troubleshooting” in Windows Search bar and click on Troubleshooting.
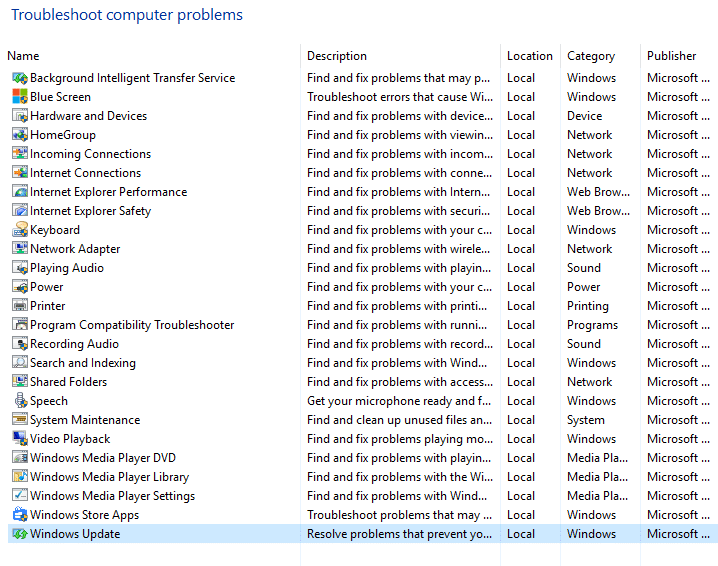
2.Next, from the left window pane select View all. 3.Then from the Troubleshoot computer problems list select Power.
4.Follow on-screen instruction and let the Power Troubleshoot run. 5.Reboot your PC when the process is complete and check if Windows 10 Slow Shutdown problem is fixed or not.
Method 7: Registry Fix
1.Press Windows Key + R then type “regedit” (without quotes) and hit Enter.
2.Navigate to the following Registry Key: Computer\HKEY_LOCAL_MACHINE\SYSTEM\CurrentControlSet\Control 3.Make sure you have highlighted Control in the left pane then look for WaitToKillServiceTimeout in the right window pane.
4.If you haven’t found the value then right-click in an empty area on the right-hand side of registry window and click New > String Value. 5.Name this String as WaitToKillServiceTimeout and then double click on it. 6.If you have created or if you already have the WaitToKillServiceTimeout string, just double-click on it and change its value between 1000 to 20000 which corresponds the value between 1 to 20 seconds successively. Note: Don’t save this value too low that would lead programs to exit without saving changes.
7.Click Ok and close everything. Reboot your PC save changes and then again check the if the issue is resolved or not. Recommended for you:
Fix REGISTRY_ERROR Blue Screen Errors How to Fix Windows 10 not using full RAM Fix Internet Explorer Has Stopped Working Because of iertutil.dll Fix Windows Update Database Corruption Error
That’s it you have successfully Fix Windows 10 Slow Shutdown problem but if you still have any queries regarding this post feel free to ask them in the comment’s section.