Dirt and chunks of earwax on your AirPods are not only unhygienic and ugly, but they can also make you feel uncomfortable, disrupt your AirPods’ sound and functions, or even give you an ear infection! Unfortunately, while cleaning your AirPods can sound easy, AirPods can also be delicate so any mistake in cleaning them can lead to irreparable damage. In this article, we’ve put together a guide on how to safely clean your AirPods (Gen. 1, 2, and 3) of all the dirt and gunk buildup from the daily wear. Let’s get right into it.
How to Clean Your AirPods
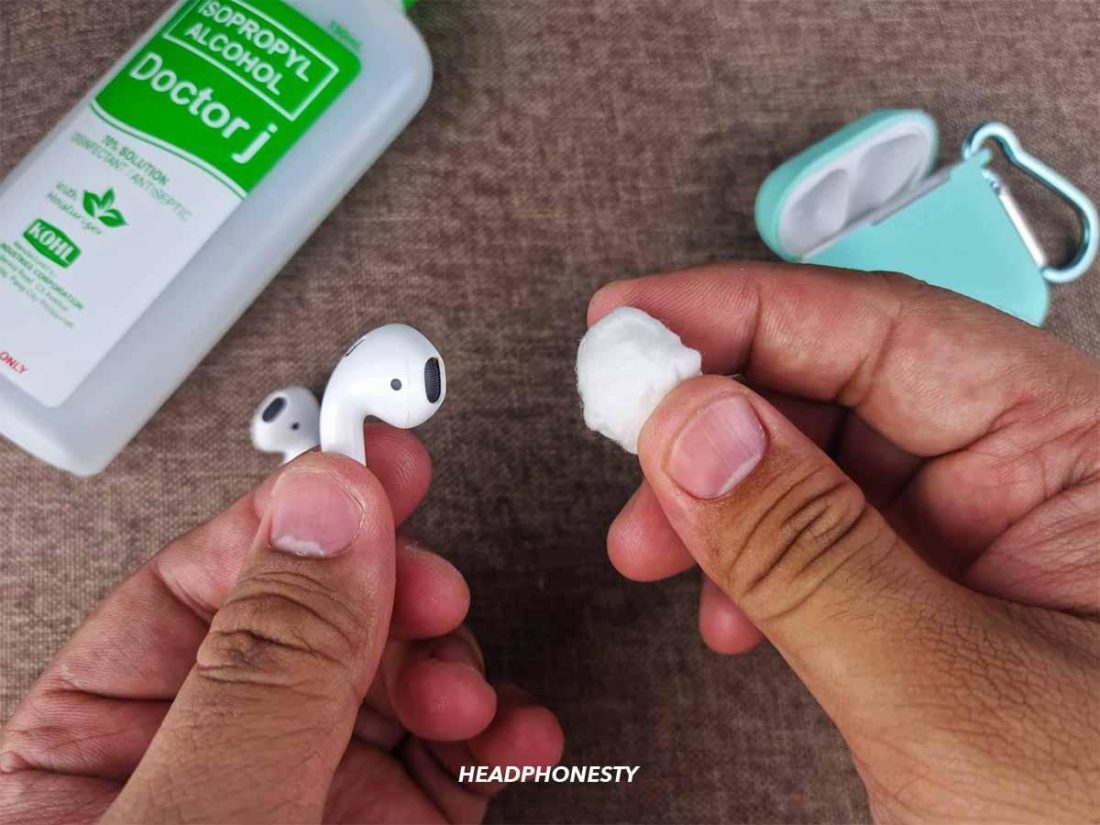
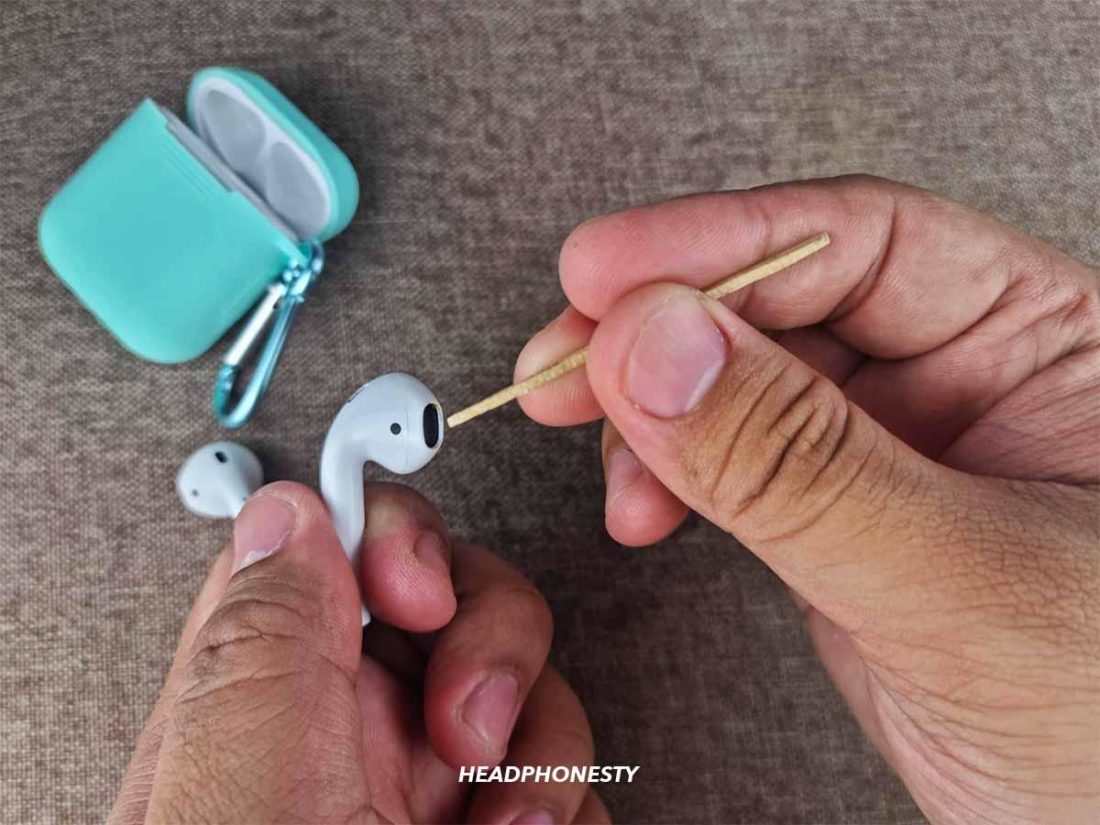
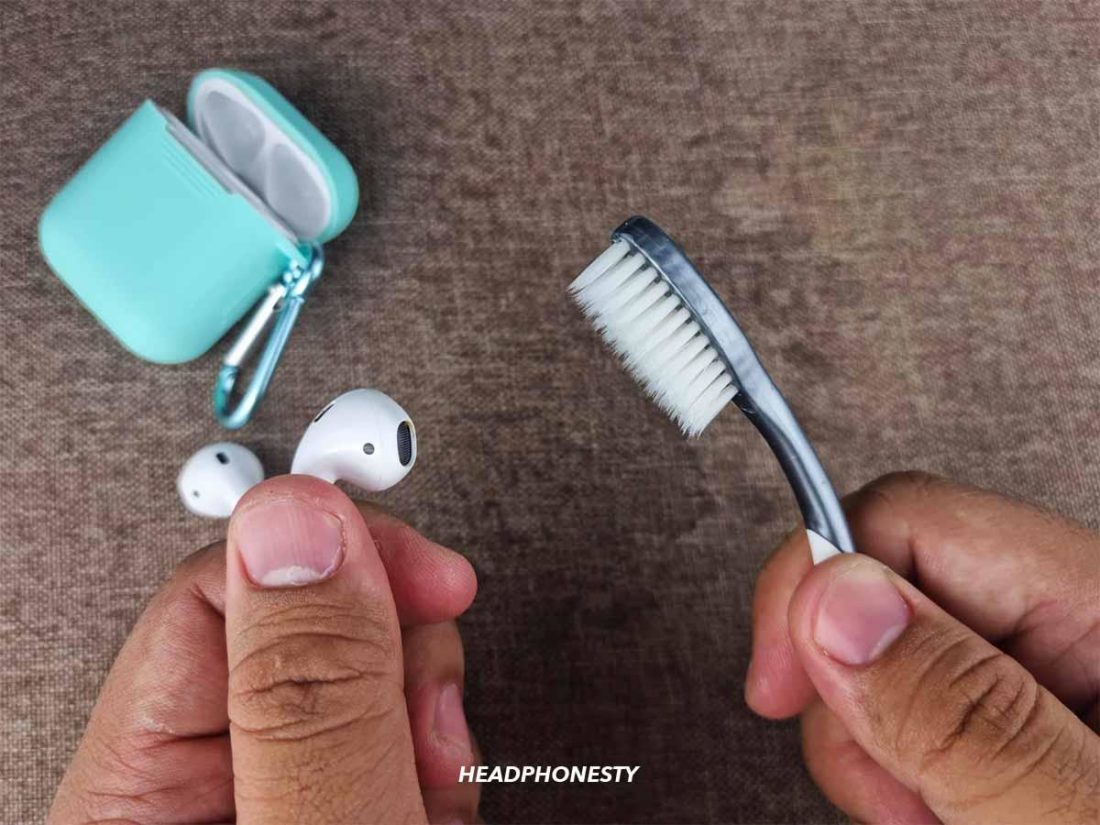
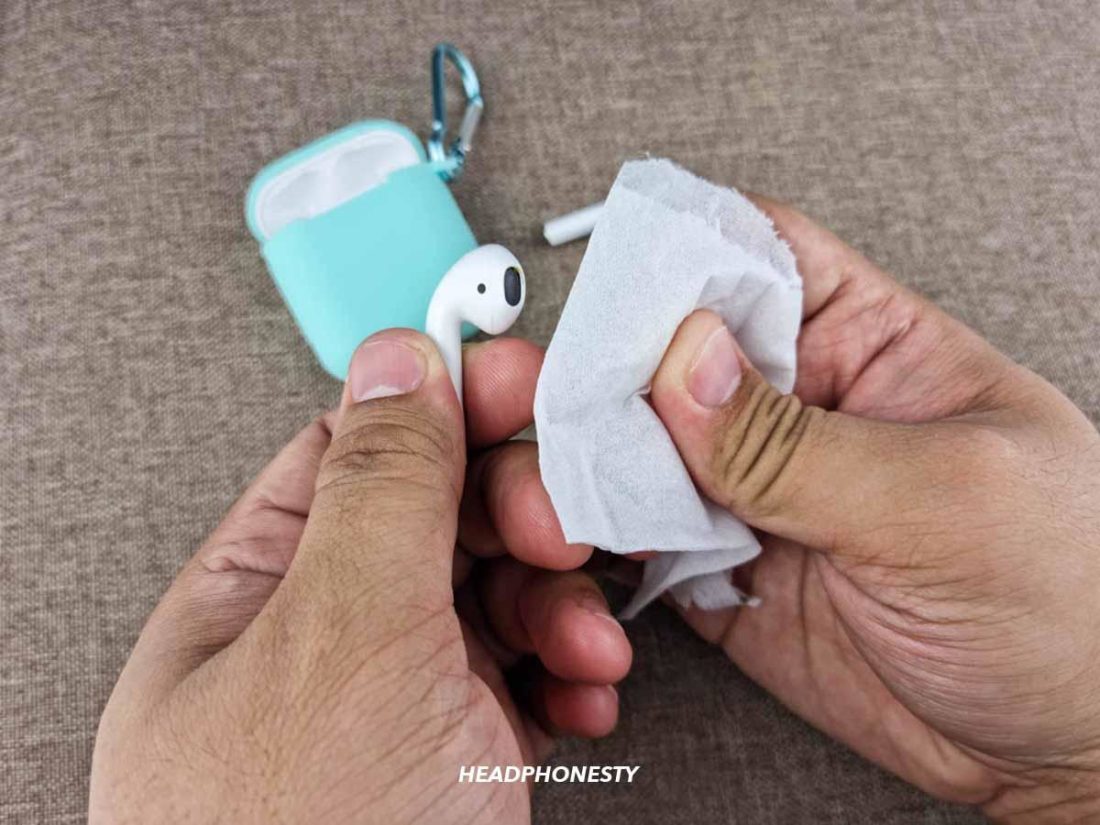
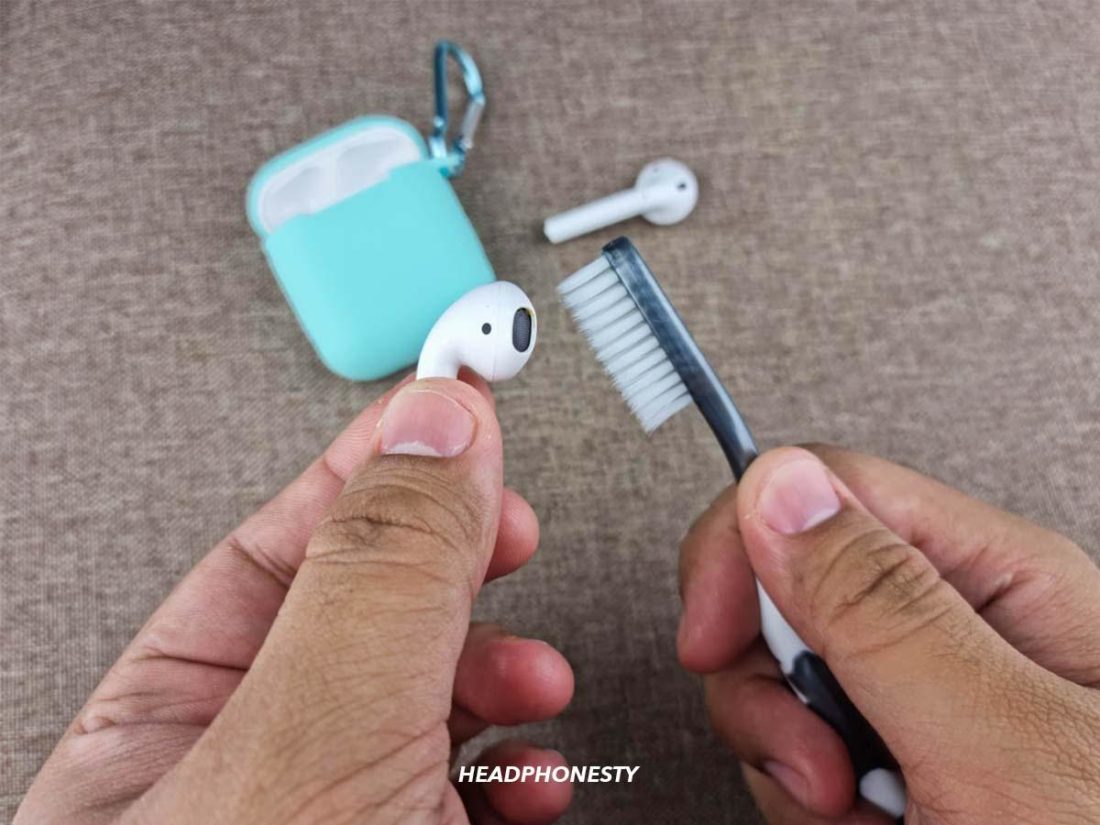
AirPods are generally durable and can withstand daily wear and tear (or even 10-feet drop tests). However, certain parts of AirPods can be a bit more fragile than others—especially the speaker mesh, which has been reported to fall off or get damaged while cleaning. Fortunately, you probably already have most of the tools you need to do this at home, such as:
Soft, dry, lint-free cloth 70% isopropyl alcohol Cotton swab(s) Toothpick Toothbrush
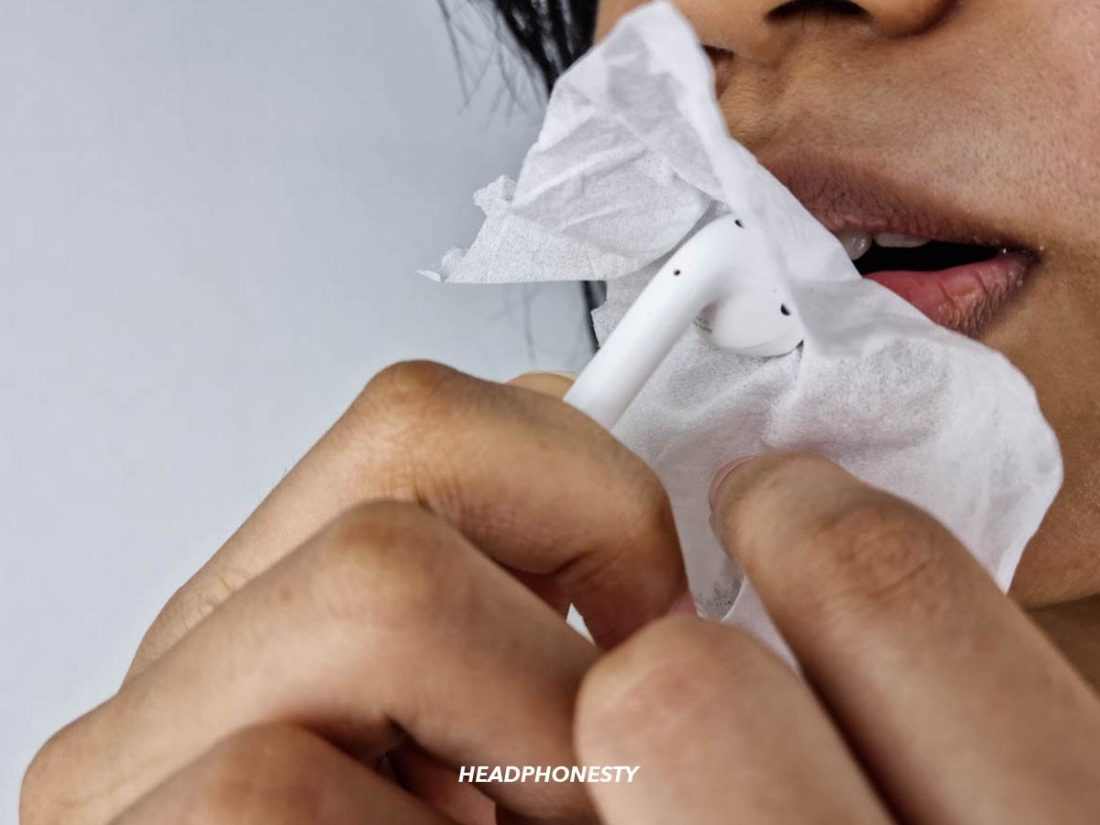
Here’s how to properly clean your AirPods:
How to Remove Stubborn Earwax on AirPods
If you have been using your AirPods regularly, there’s a high chance that there’s an earwax buildup in their speaker mesh. In some cases, these buildups are lodged so deep that the cleaning method explained above can’t possibly reach them. Luckily, there’s an easy – albeit a little gross – way to safely clean stubborn earwax on your AirPods’ speaker mesh, i.e., suck them up. Here’s how: Yes, it’s not the most hygienic way to clean your AirPods. However, doing this might save you a few hundred dollars since you won’t have to buy an AirPod replacement just because of stuck earwax.
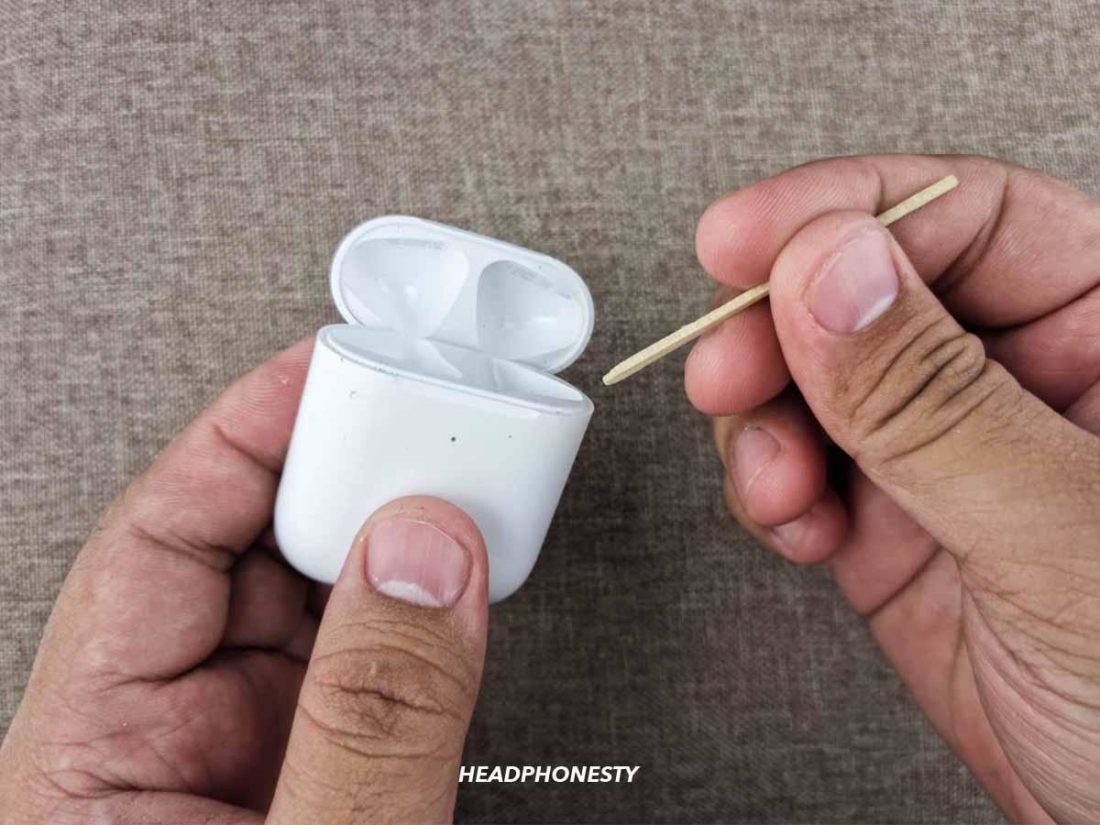
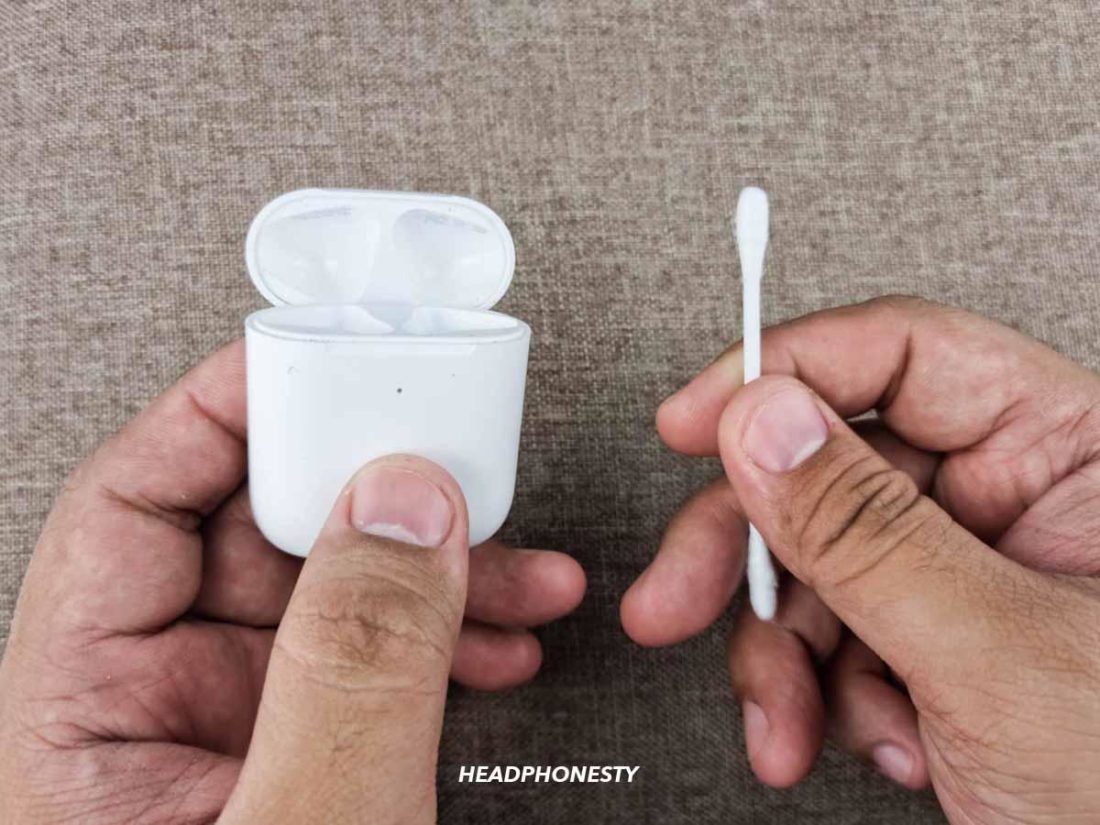
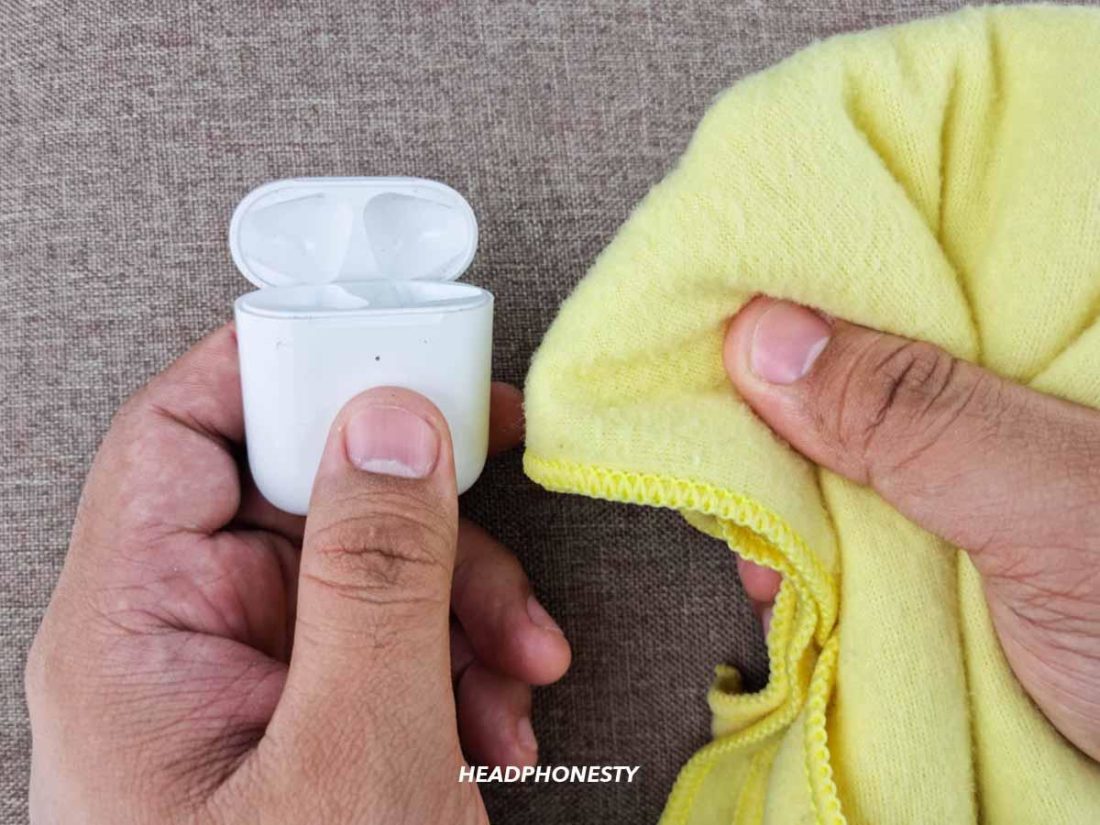
How to Clean Your AirPods’ Charging Case
A dirty charging case can cause two of the most common charging-related issues:
Dirt buildup can block the charging pins inside the case, causing one or both of your AirPods not to charge properly. This is also the main culprit for issues like AirPods that won’t reset. If there’s a buildup in the Lightning charging port, it can block electrical current from going into the charging case.
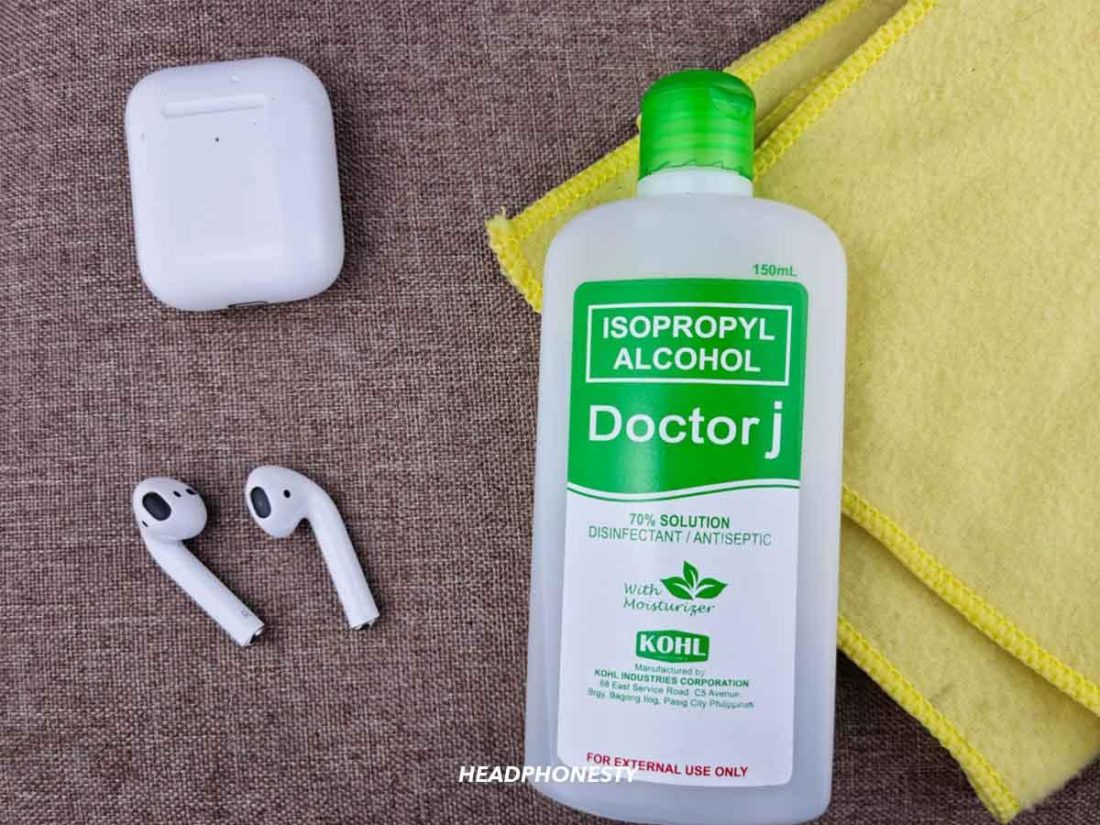
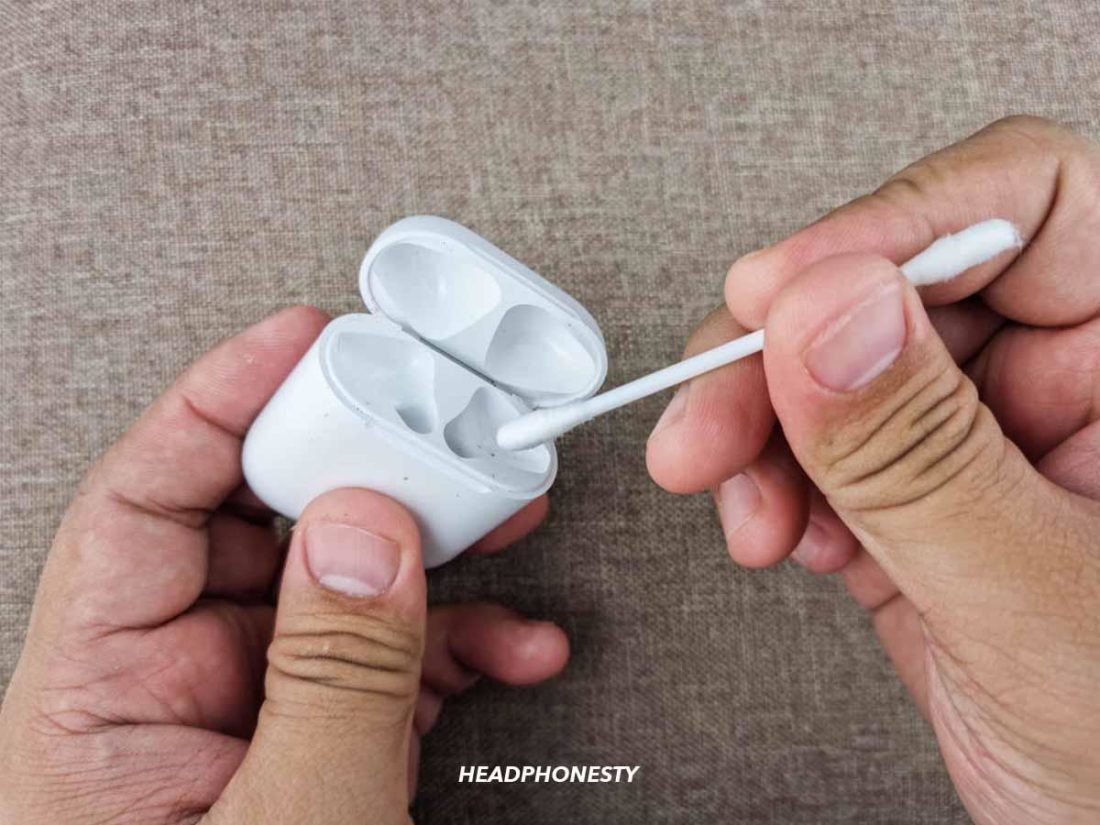
To prevent these problems, you’ll have to regularly clean your AirPods’ charging case as well. Here’s what you’ll need:
70% isopropyl alcohol Cotton swab(s) Toothpick Lint-free cloth (or paper towel)
Once you have arranged all the items mentioned above, follow these steps to safely clean your AirPods’ charging case:
What Not to Do When Cleaning Your AirPods
There are a few things you shouldn’t do when cleaning your AirPods. This is because you’ll risk damaging them to the point where they may be irreparable.
Don’t use too much water
Apple’s AirPods are not waterproof. In fact, the original AirPods (1st and 2nd generation) have no water resistance. And, while the AirPods Pro and AirPods Gen 3 have an IP rating of IPX4, they are, at best, only protected from sweat and light rain. Since no AirPods model is certified for complete water submersion, using too much water while cleaning them can cause water damage to your AirPods. Isopropyl alcohol (at least 70%) is arguably the best option for cleaning most electronics as it can kill bacteria and evaporate faster than water. It also doesn’t leave any traces of oil or liquid once it evaporates.
Don’t use abrasive materials
Apple advises against using abrasive materials to clean your AirPods as they can scratch and damage the outer surface of your AirPods and their case. For your AirPods, abrasive materials are anything made with hard enough density that can scratch your AirPods’ plastic body. These items include any type of metals or hard plastic, rough clothes like denim, or even nail polish remover. So, stick to objects with soft materials like cotton swabs, toothpicks, and micro fiber or cotton cloths when cleaning your AirPods. Ensure to also avoid harsh cleaning agents like bleach and 90%+ alcohol since they can also damage the plastic.
Don’t use Blu-tack
There are many articles that suggest using Blu-tack for cleaning AirPods. However, do not try this method because Blu-tack will only push the dirt and earwax from the mesh further into your AirPods. There is also a chance that the Blu-tack will break down and leave more debris than it cleans – especially when you use it to clean the speaker mesh. As a result, it will be even more difficult—and nearly impossible—to clean without taking your AirPods apart.
Don’t use compressed air
Despite popular belief, compressed air should never be used when cleaning your AirPods. The high pressure of the compressed air can cause damage to the delicate parts of your AirPods and their case, namely the speaker mesh and charging port.
Don’t use the AirPods while they’re still wet
Even after you wipe your AirPods down with a dry cloth, there may still be traces of liquid that you can’t see. So make sure to air dry them completely before using them. Using your AirPods while they’re wet exposes a risk of electrical surge that can break the circuitry. The liquid may also not be able to completely dry when you wear them or put them in the case, which can lead to corrosion if left for a longer period.
Why Is Keeping Your Airpods Clean Important?
Keeping your AirPods (and their case) clean is important for two main reasons:
Hygiene concerns
Cleanliness is often overlooked when it comes to items you use or wear daily, like AirPods. In extreme cases, not cleaning your AirPods and other headphones can even cause ear infections. This is because your AirPods and their case often sit in places where they get exposed to all sorts of bacteria like your bag, pockets, under the car seat, or just random surfaces around your house. To top it off, there are also natural bacteria inside your ears that you wouldn’t want nesting on your AirPods for a long time. This is due to the closed-off and moist environment between your ear canals, making them an effective breeding ground for such bacteria.
Impact on sound quality
Not cleaning your AirPods consistently means the old dirt and wax buildup will gradually be pushed back further, going through the speaker mesh and eventually getting to the speakers and the mic. The initial buildup may only reduce the sound details. But once the buildup grows denser, it can cause your AirPods to be not loud enough to the point where it’s no longer suitable for outdoor use. This can also lead to various sound issues such as unbalanced sound from your AirPods.
Impact on functionality
While it may seem trivial, dirt buildup can affect the various functions of your AirPods. For instance, if there’s a dirt buildup blocking the charging plate in your AirPods case, your AirPods won’t reset, or one of your AirPods may not charge.
Impact on comfort
Frequently using your AirPods without cleaning them causes their tips to collect oil and earwax over time. This can ultimately cause your earbuds to easily fall out from your ears. If this is the case, you might have to wear your AirPods in the wrong position to keep them from falling out. Then again, wearing your AirPods the wrong way for extended periods can hurt your ears. You get the drift: the solution is to keep your AirPods squeaky clean as much as possible.
How Often Should You Clean Your AirPods?
To avoid an excessive buildup of foreign bodies inside the AirPods, it’s a good idea to clean your AirPods every 72 hours of listening time. In addition to this, it’s also essential to keep your ears clean. This will help reduce the amount of wax that enters your AirPods, which eventually keeps them more hygienic for longer.
Conclusion
No longer will you need to worry about others seeing your dirty headphones or grimy buildup affecting your audio quality. Keeping your headphones clean is a proactive step in making sure they’re performing at their best. That said, it’s important to remember that while cleaning your Airpods may solve many related problems, it’s not a one-stop solution to fixing everything. From pairing problems to audio concerns, a lot more can and does go wrong when using AirPods. Luckily, we have a comprehensive guide covering all possible reasons why your AirPods may not be working the way you want them to. Did the above cleaning methods work for you? Do you have another way of cleaning your headphones? Let us know in the comments below!