It’s unnerving when your AirPods have been functioning like a dream, until one day, one of them just suddenly sounds louder than the other. With the audio feeling unbalanced, it can easily become a pain to listen to music or even have a proper phone call. Eventually, this gets even more frustrating when it starts to cost you, your productivity! Agonize no more. In this handy guide, we’ll show you possible reasons why one of your AirPods might sound quieter than the other and share several solutions to help you fix it. Read on to find out how!
Why Is Your One AirPod Louder Than the Other?
A key reason why one of your AirPods is louder than the other can either be a hardware-related problem or a software issue around firmware, files, or audio settings. The problem is, it’s best to know the root cause before attempting any solutions. That way, you’ll better understand the corresponding fixes and maybe even avoid experiencing it again. Let’s review some of these possible causes below:
Firmware problems Audio file issues Hardware problems Audio source setting issues
Firmware problems
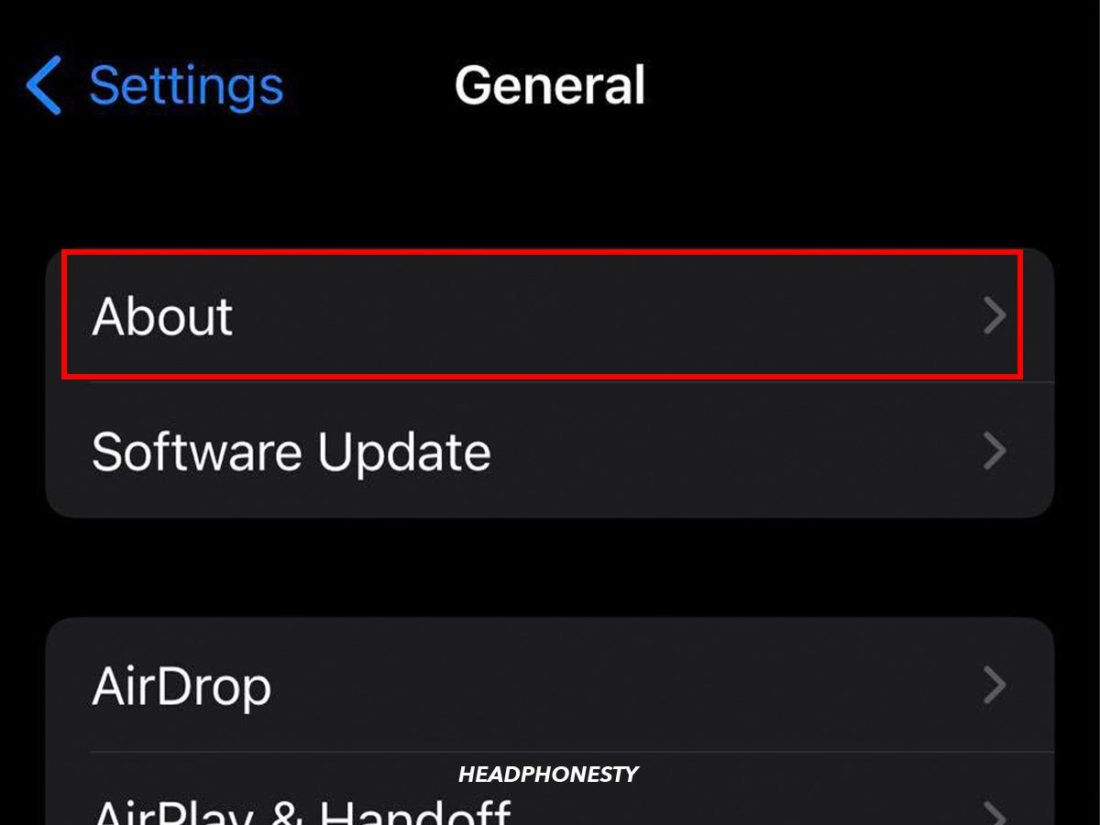
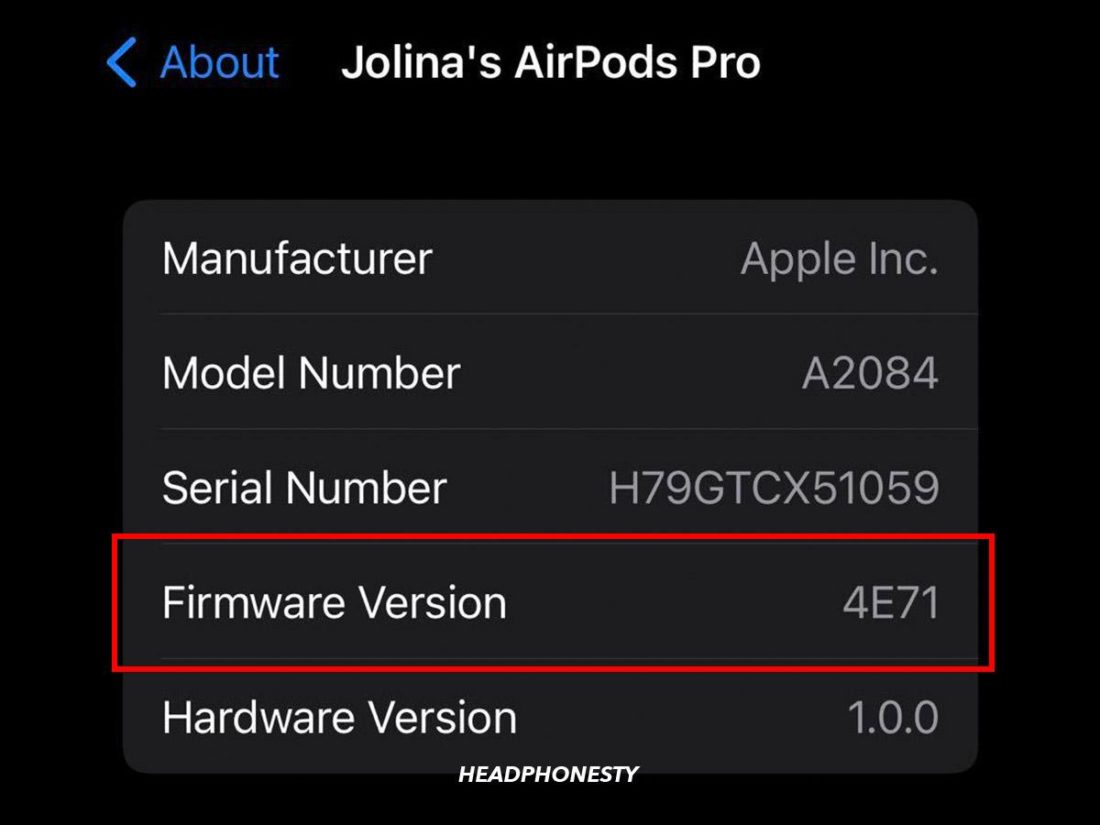
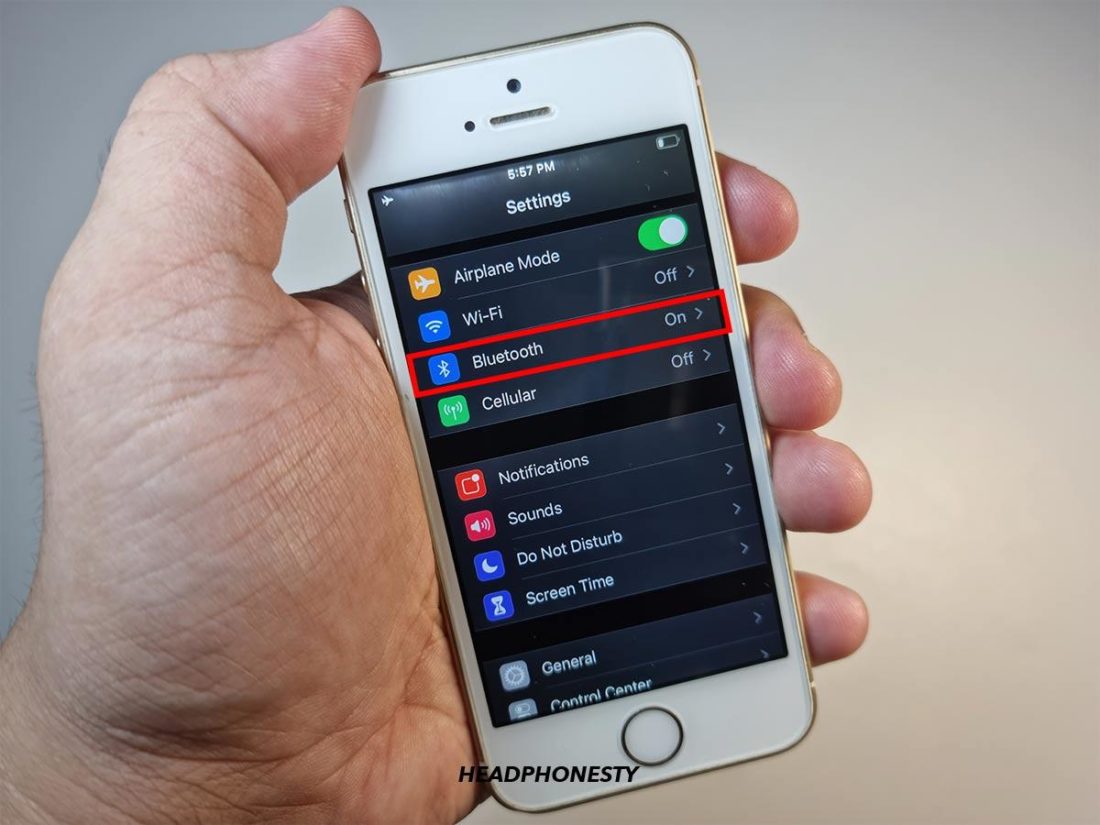
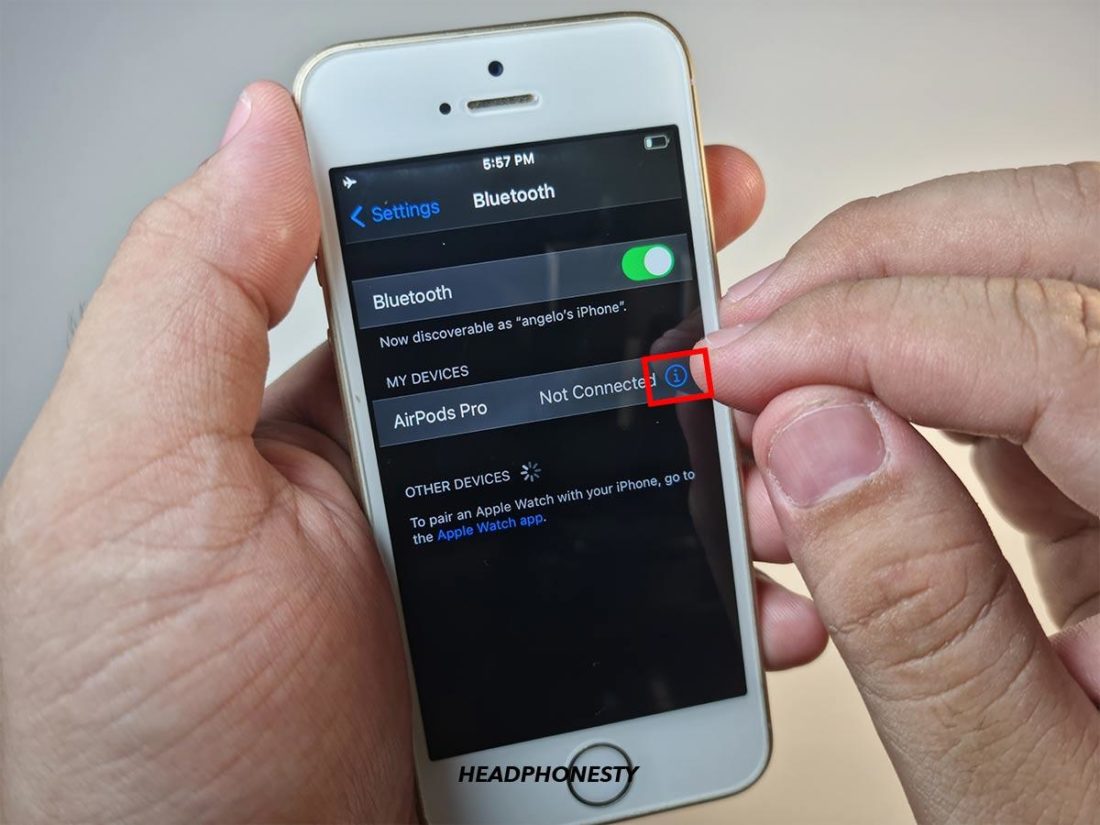
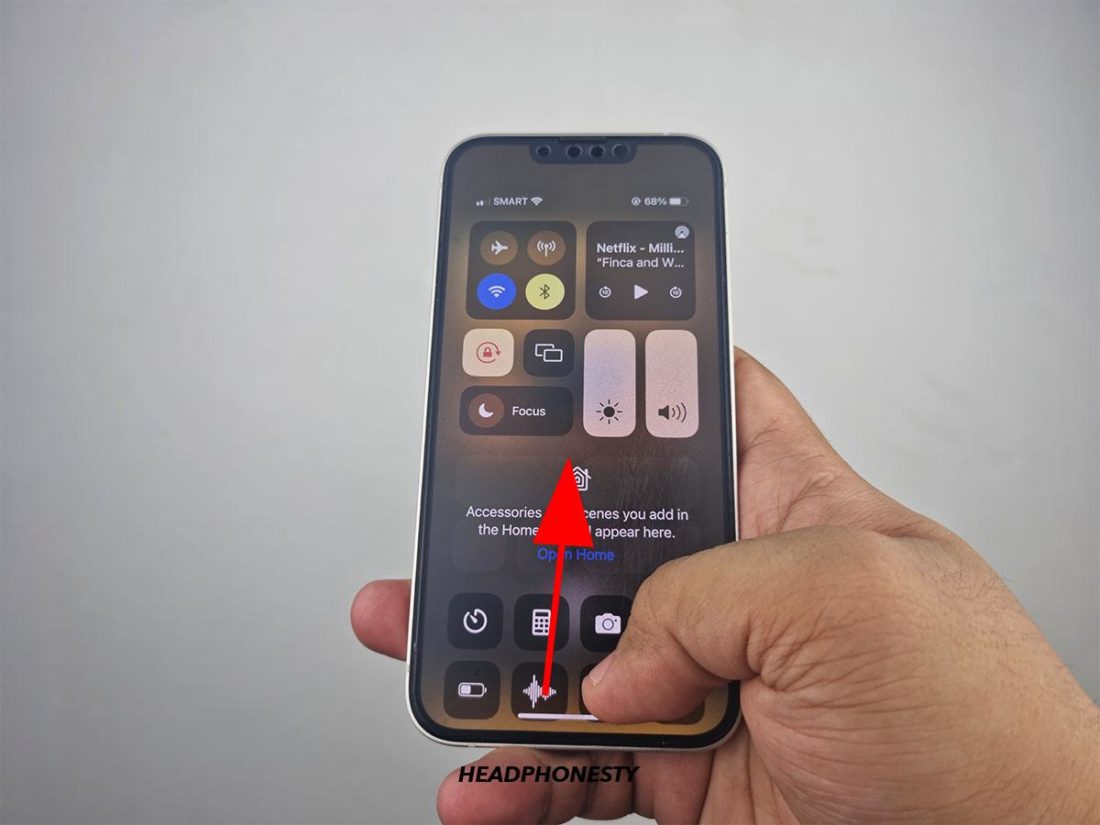
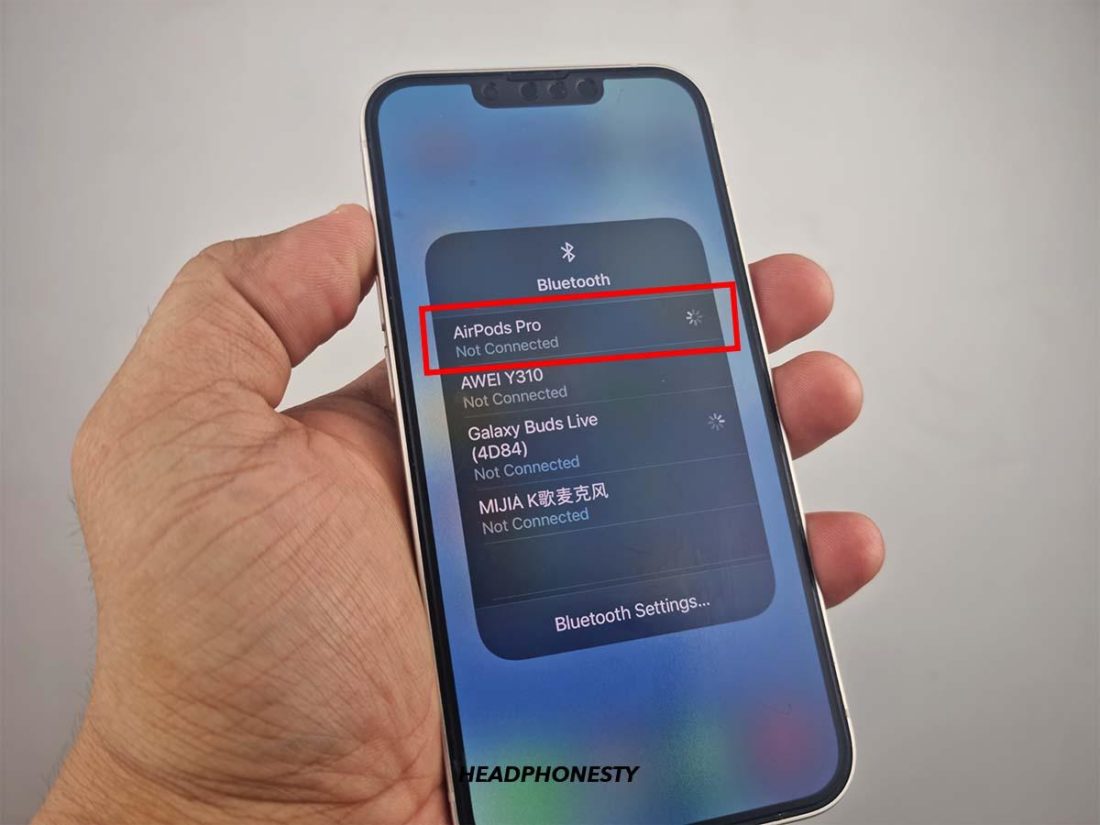
Apple sometimes releases firmware updates for the AirPods to improve performance and to upgrade their features. These updates also help patch any bugs, issues, and other incidental errors that may be preventing your AirPods from functioning properly. So if your AirPods’ firmware isn’t updated, they may still have these issues that ultimately result in unbalanced sound. To check whether your AirPods’ firmware is updated using your iOS device, follow these steps:
Audio file issues
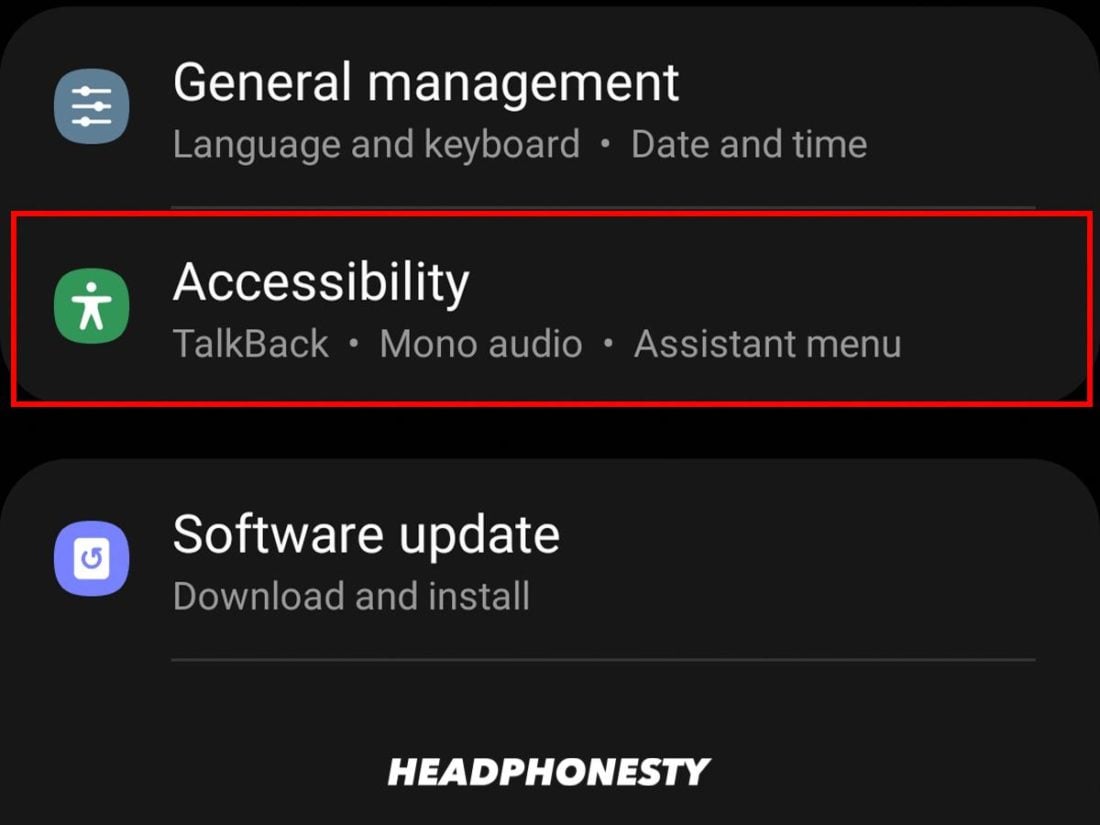
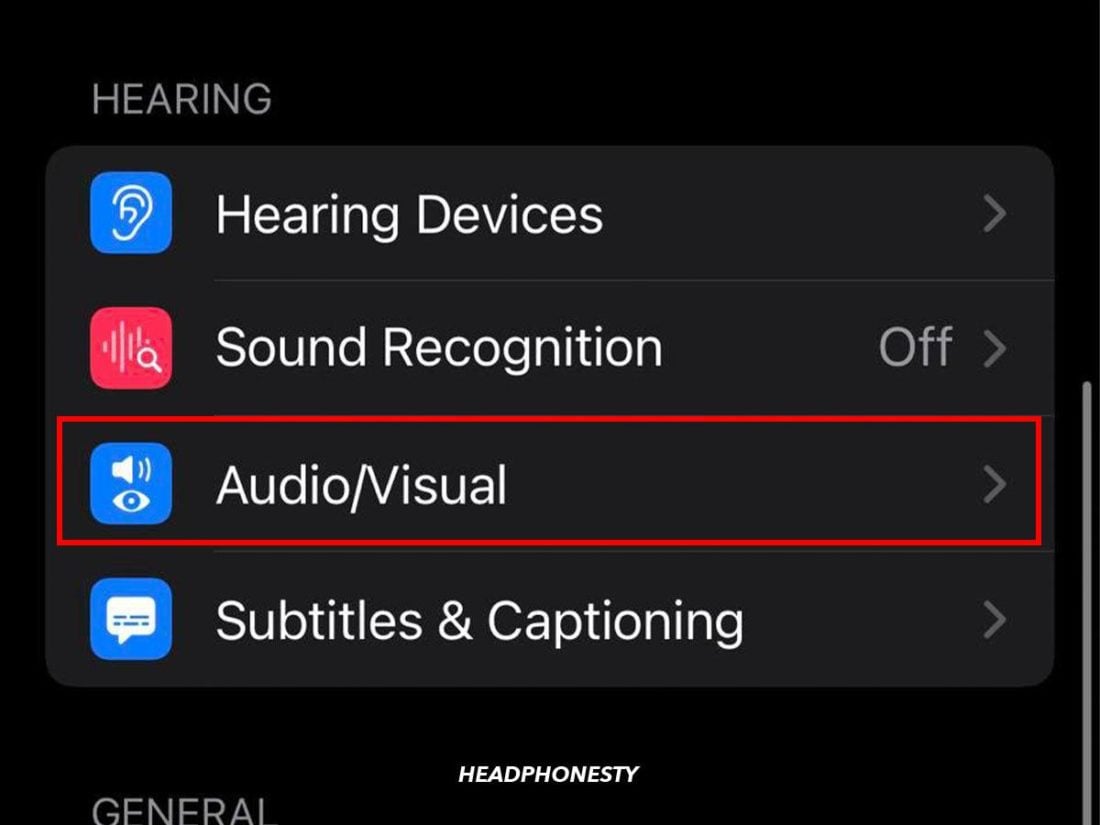
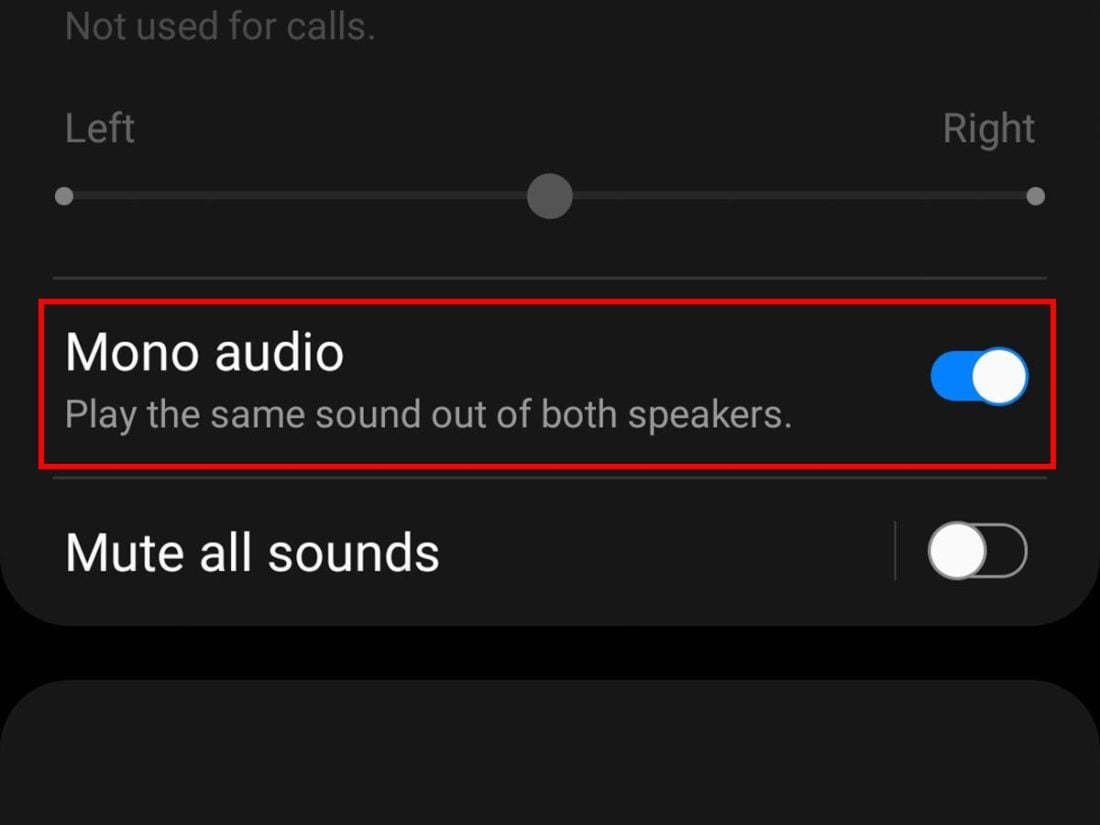
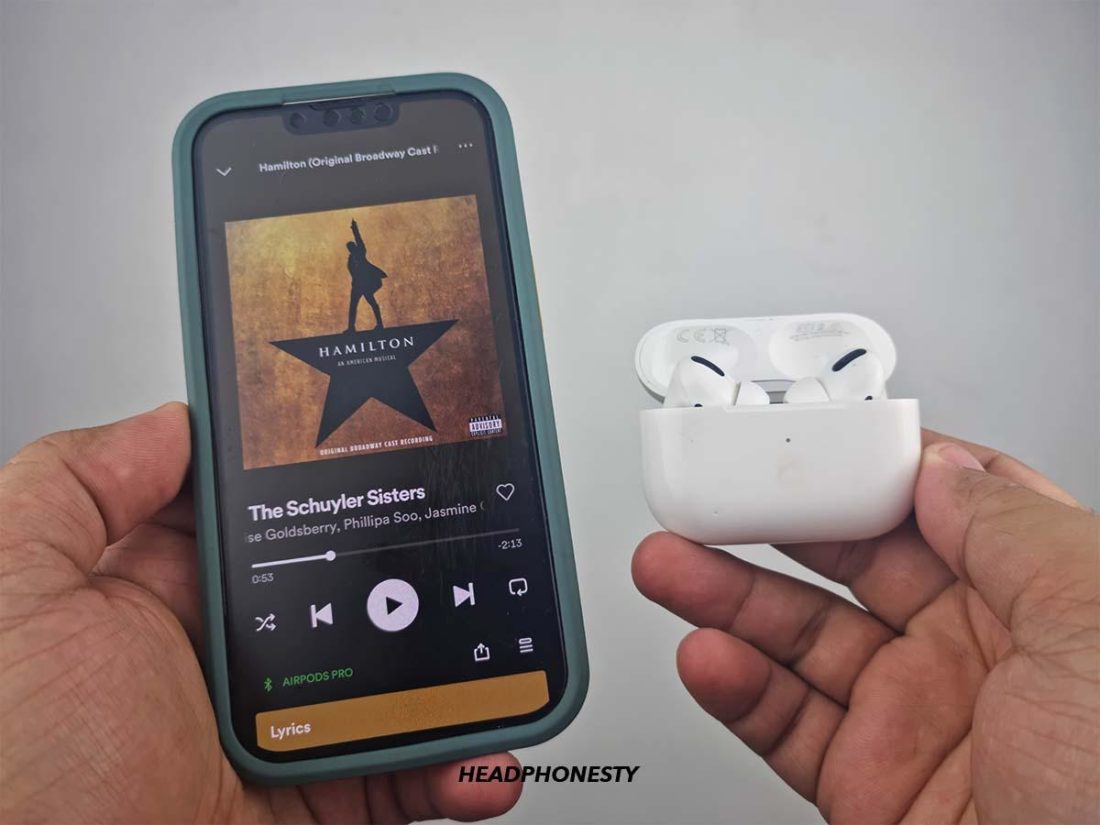
Sometimes you may overlook the possibility that it’s actually your audio file that has an uneven sound profile. Most audio files we listen to are stereo tracks that send an audio signal to two different channels – left and right. Sound engineers and artists often use software to manipulate these audio files to create more immersive soundscapes. Audio panning is one such technique that can alter the perceived distance between sounds in the left and right speakers of a stereo track. For example, producers can attenuate specific instruments to sound more pronounced on one speaker over the other, creating unique sonic experiences for listeners. To check if it’s indeed your audio file that sounds unstable, you can switch your AirPods to Mono Mode. Toggling Mono audio disables the stereo output and sends the same audio signal to both speakers. This feature helps disrupt any audio panning and easily verify if your audio file has an unequal sound on either of the speakers. Here’s how you can switch your AirPods to mono audio:
Hardware problems
Apart from software-related problems like an imbalanced audio file or outdated firmware, it might simply be an issue with your AirPods’ internal mechanism and hardware. For instance, dirt build-up inside your AirPods can interfere with the internal circuitry and muffle sound transmission. Also, if you don’t clean your AirPods regularly, earwax can accumulate on the speaker grill mesh and block sound from passing through.
Audio source settings issues
If it’s none of the causes mentioned above, the issue might actually lie with your audio source. Your phone or computer could be experiencing technical bugs affecting sound output. Having improper audio enhancement settings is another possible reason. While they’re made to create a more personalized sound, having incorrect settings can also create the impression that your music is too soft or unbalanced. To see if this is the case, try connecting other wireless headphones or another pair of AirPods to your audio source. If the lopsided sound volume persists, then it’s likely that your audio source’s settings are the cause.
One Airpod Louder Than the Other: Software & Hardware Solutions
Now that you’ve identified the possible hardware and software-related problems, let’s explore the solutions.
Reset the AirPods Update your AirPods’ firmware Clean your AirPods For AirPods Pro: use the Ear Tip Fit Test Adjust the sound balance Calibrate the AirPods’ volume Restart the audio source
Reset the AirPods
A hardware reset is a standard solution that can help resolve most issues, glitches, or bugs. Therefore, resetting your AirPods returns them to their original default configuration, which may remove sound or connectivity issues. Follow these steps to reset your AirPods or AirPods Pro:
Update your AirPods’ firmware
Currently, there is no known way to update your AirPods’ firmware manually or without using an iOS device. However, your AirPods will automatically install the latest firmware update as long as they’re connected to an iPhone with a secure internet connection. To make sure this is done properly, leave the AirPods connected to your iOS device for about 30 minutes without using them.
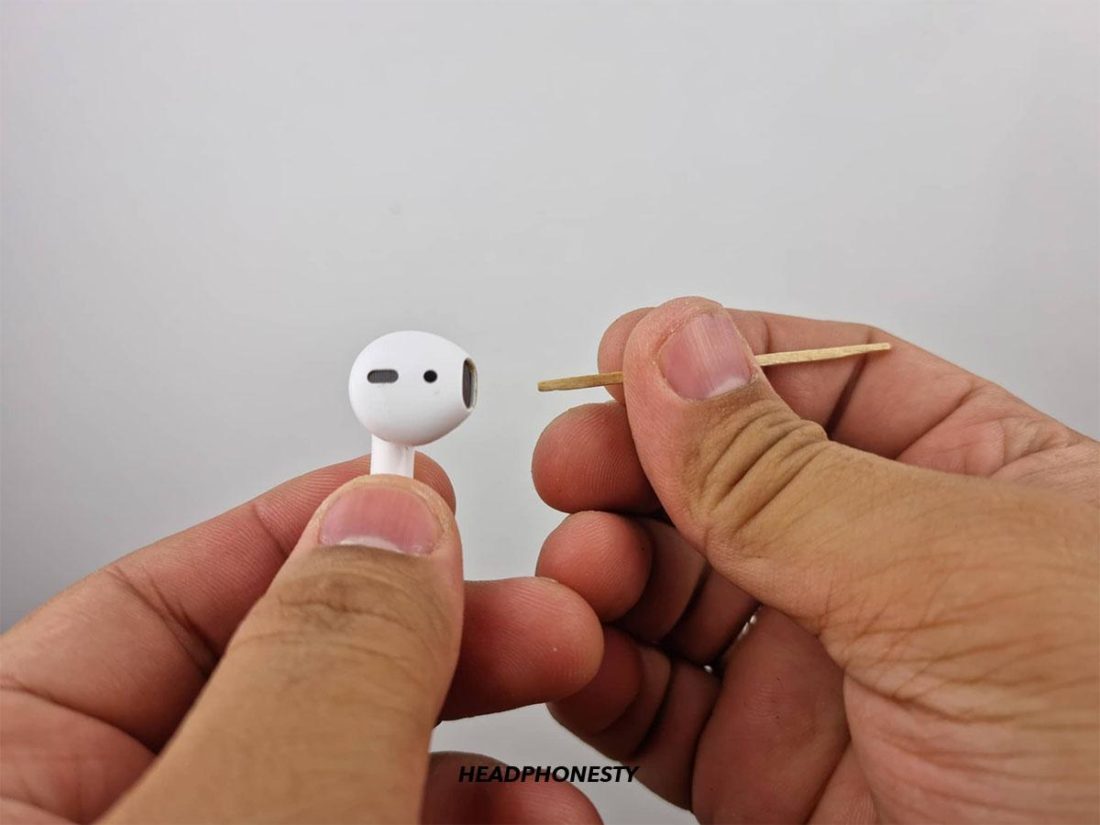
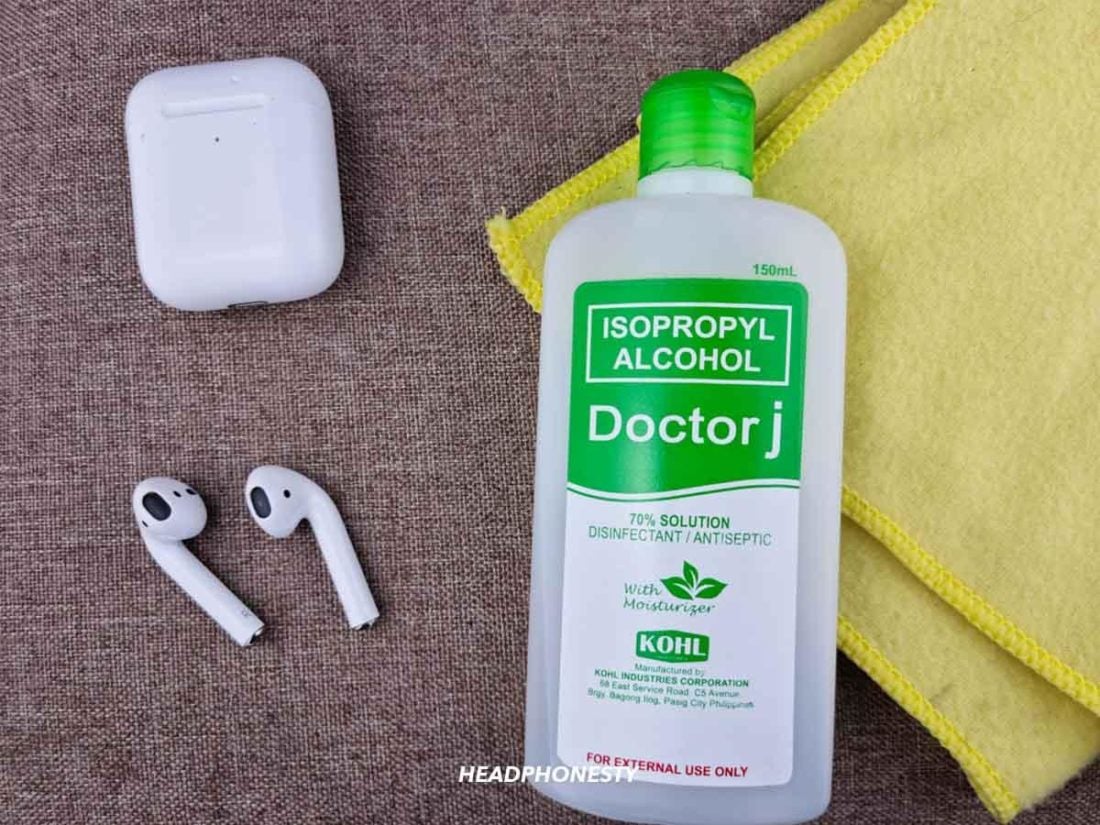
Clean your AirPods
Cleaning your AirPods is not only hygienic, it also helps clear out dirt or foreign bodies that can clog up and affect sound output. Before you begin, make sure you have the following cleaning supplies ready:
Soft, dry, lint-free cloth 70% isopropyl alcohol solution Toothpick Old soft toothbrush Cotton swabs/q-tips
Then follow these steps to clean your AirPods:
If there is stuck earwax: suck it up
Even with deep cleaning, certain foreign elements like stuck earwax build up inside your AirPods and can’t be easily removed. To combat this issue, some AirPods users have discovered a trick that can effectively dislodge the earwax without needing to take your AirPods apart. Their ingenious solution? Use your mouth to suck it up. You can start by placing a clean cloth over your AirPods’ speaker mesh. Then suck through the cloth into your AirPod, periodically pausing to wipe it clean each time. The idea is to keep sucking until you can feel the airflow through your AirPod. That’s a sign that the insides of the speaker mesh are clear of any earwax obstruction. Finally, check the volume level of both AirPods to confirm whether they sound even.
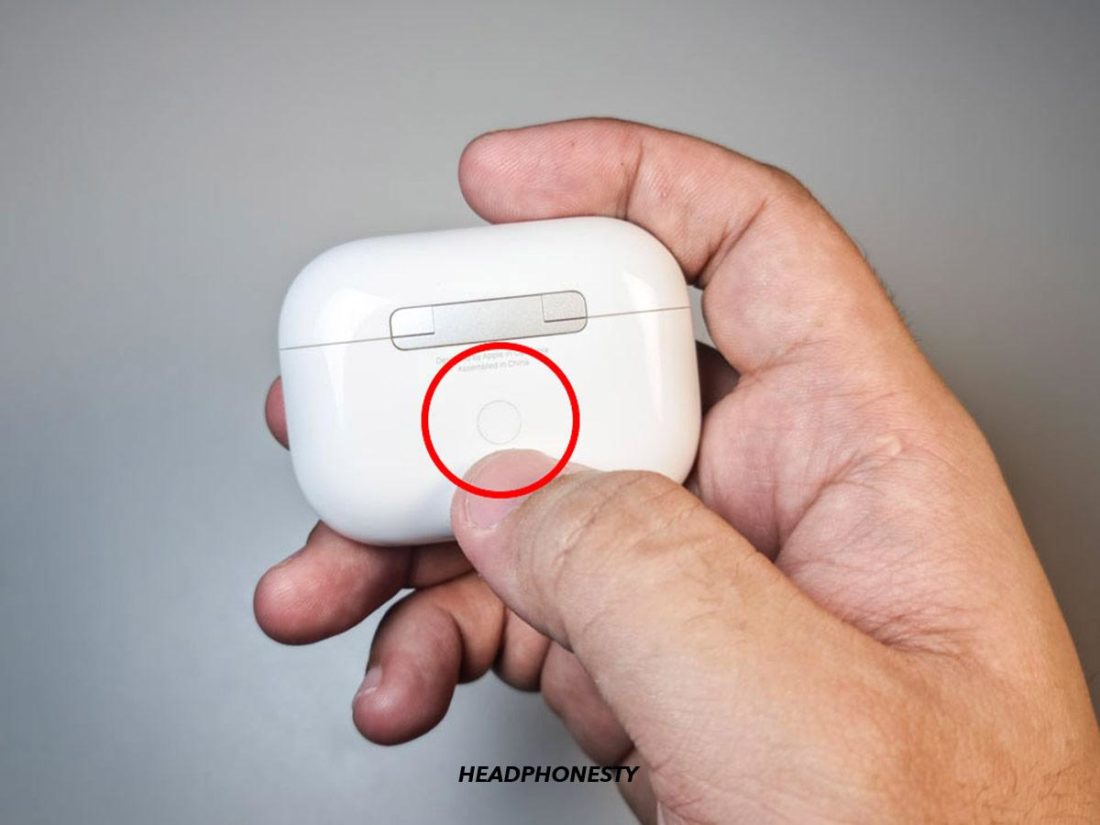
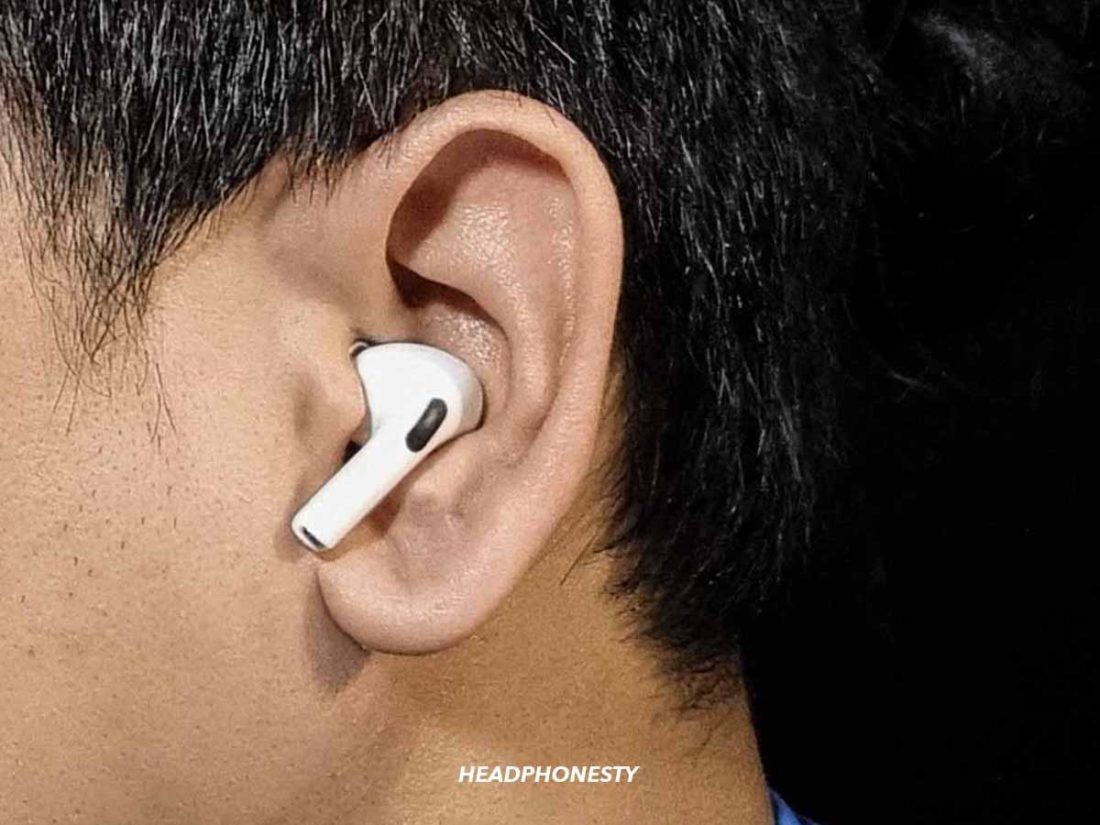
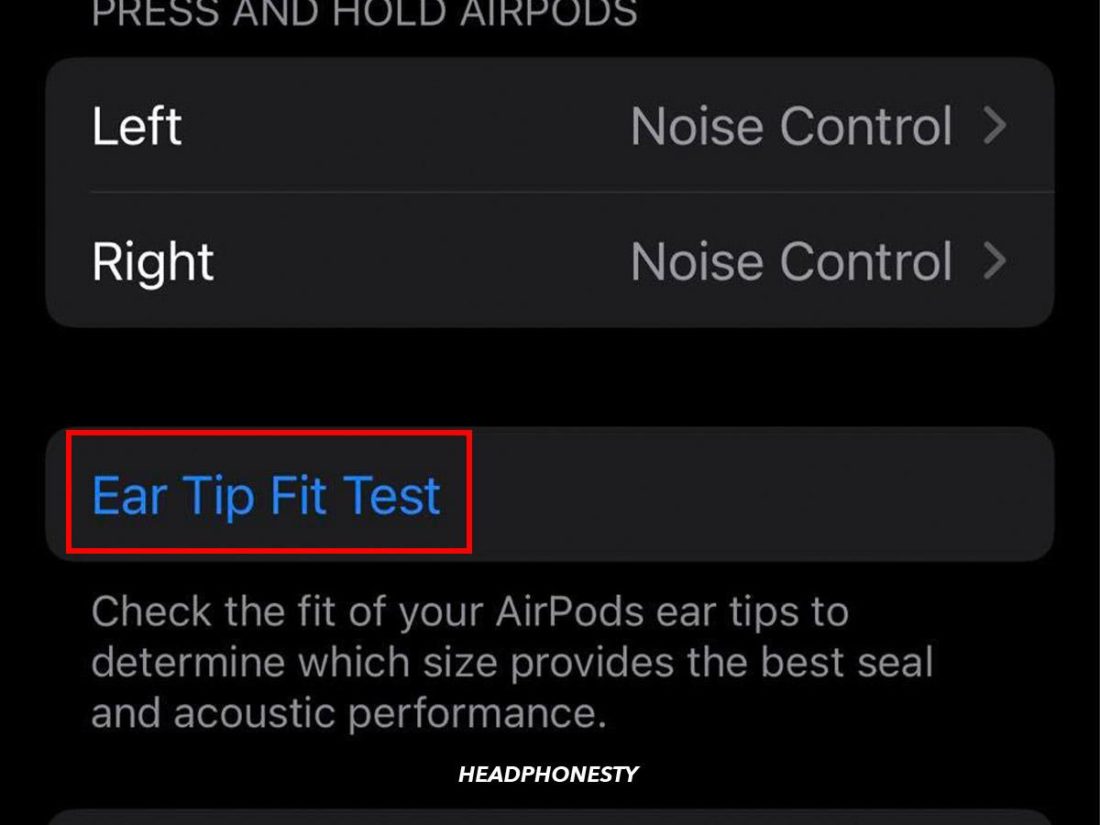
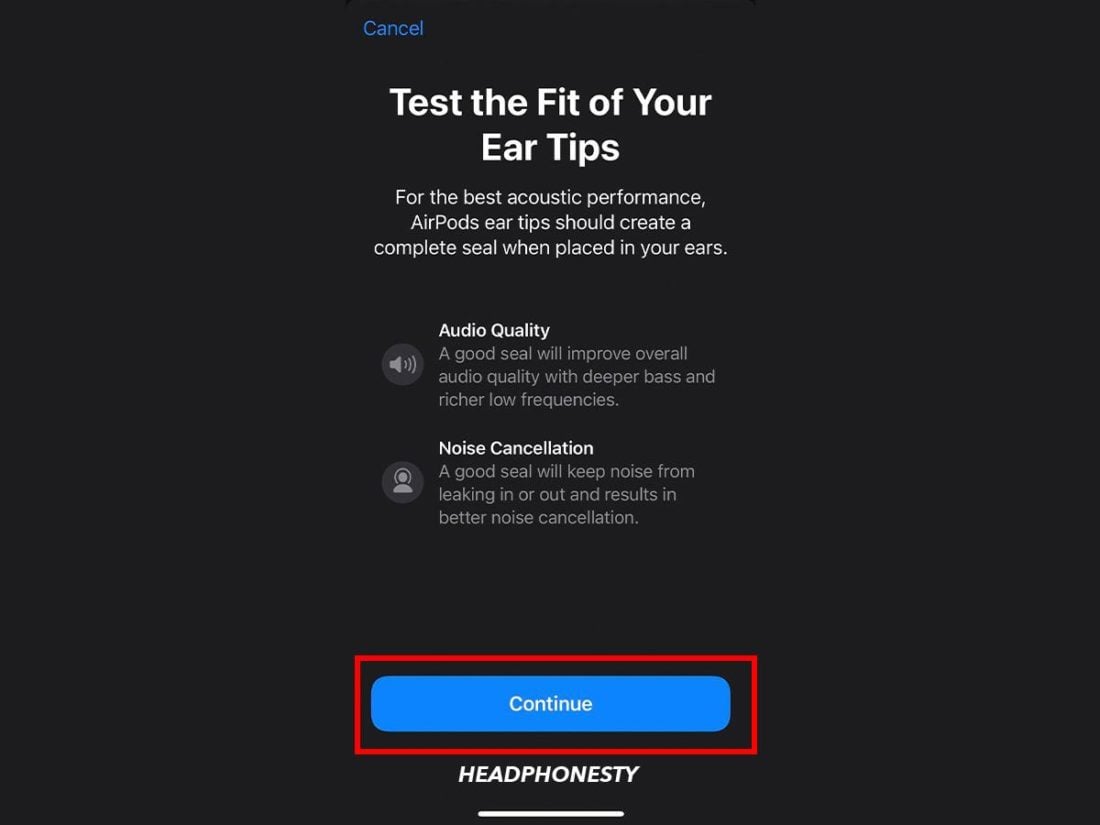
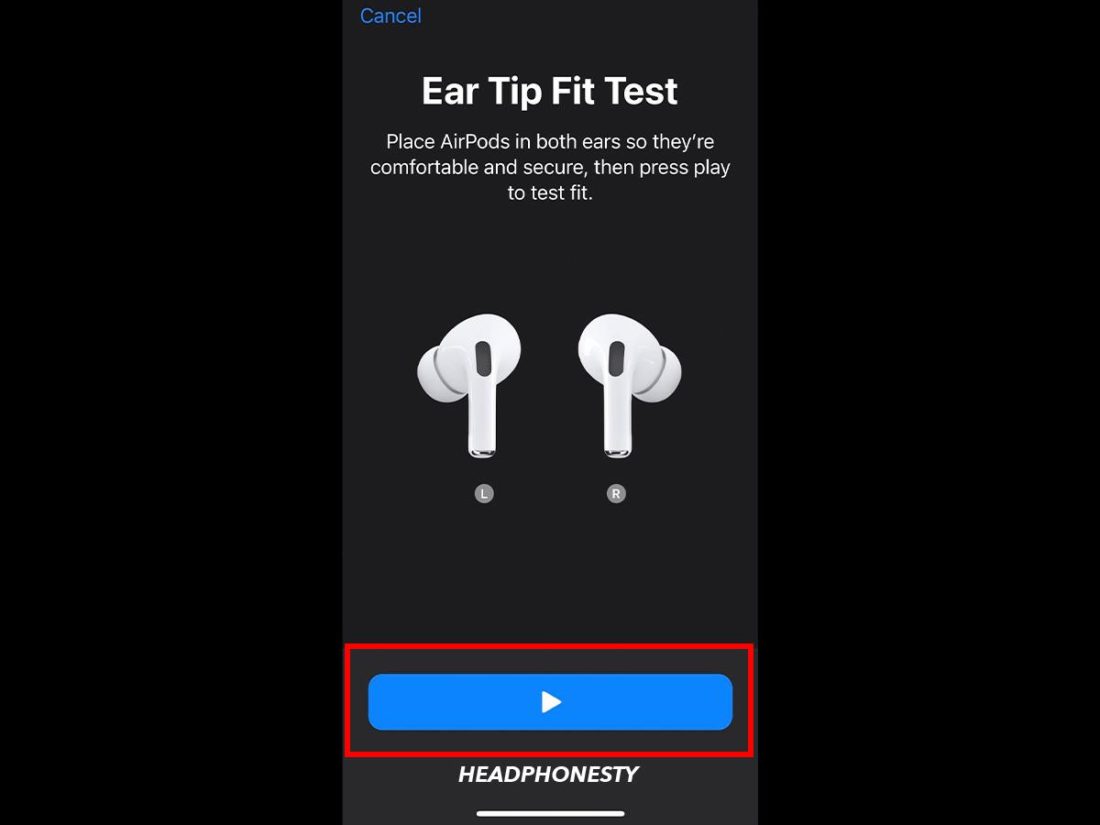
For AirPods Pro: use the Ear Tip Fit Test
For AirPods Pro users, you can use the Ear Tip Fit Test to achieve better sound isolation. This minimizes sound leakage and any background noise from coming through. As a result, you can get greater audio perception, and it could even help your AirPods sound louder. Here’s how to do the ear tip fit test: Depending on your test results, you may need to adjust your AirPods Pro or try a different ear tip size to get the best fit and acoustic seal.
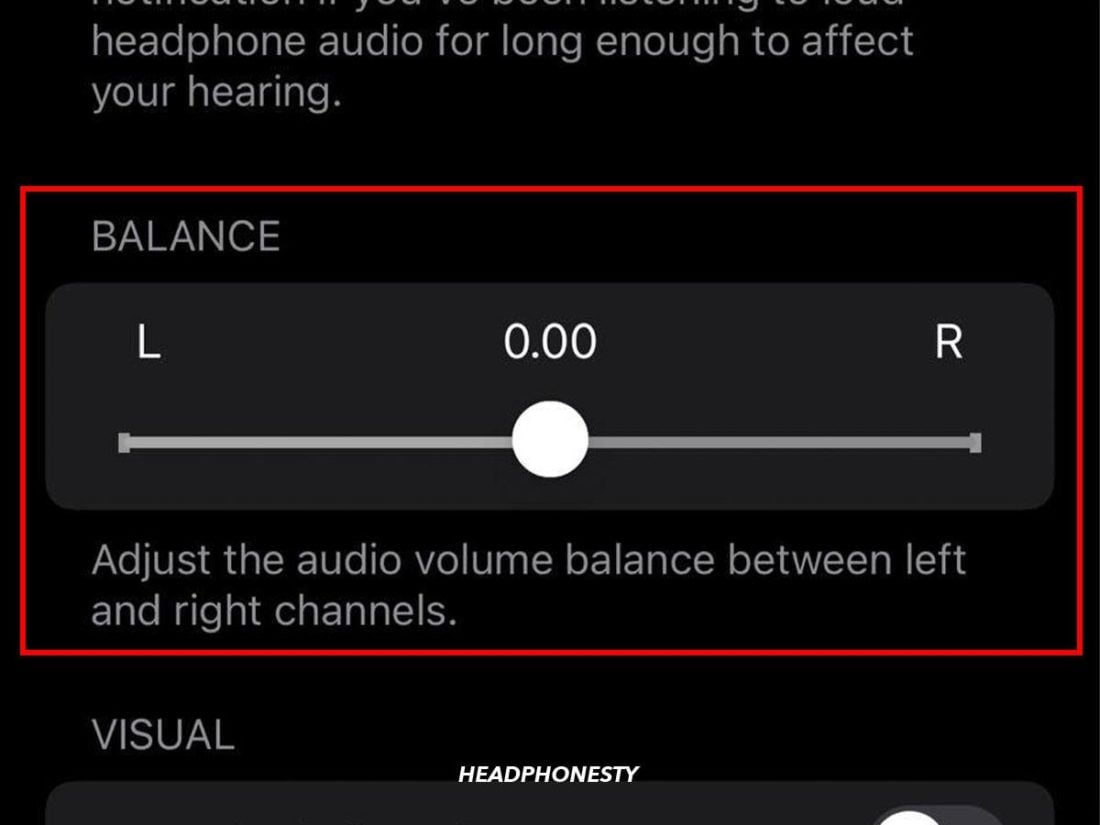
Adjust the sound balance
Sound balance allows you to control the volume of each AirPod by tweaking the settings to shift sound towards the left or right AirPod. This is an incredibly convenient feature for people who are hard of hearing in one ear. However, if you’d accidentally changed these settings, it might result in one of your AirPods sounding softer than usual. In just a few simple steps, you can fix this by adjusting your sound balance. Here’s how:
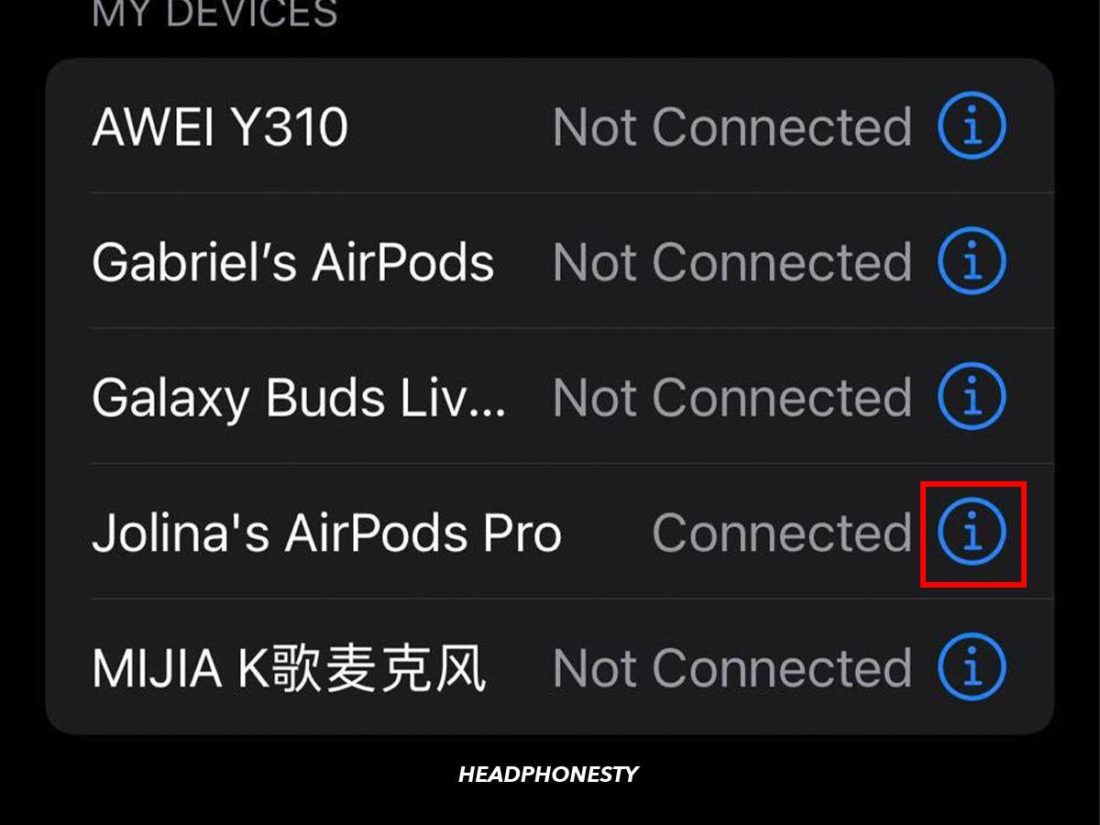
Calibrate the AirPods’ volume
Sometimes, your AirPods and device may not be in sync, preventing your AirPods from utilizing the full audio or volume control available. An easy way to fix this is to calibrate your AirPods’ volume with your iOS device. Doing so can make them sound louder and help improve the overall audio balance. To do this, follow these steps:
Restart the audio source
Whether your music is playing from a computer or a mobile device, restarting your audio source might help resolve this problem. Take note that the steps to restart will vary depending on your device. For instance, for iOS device owners, you can simply press and hold the power and volume down buttons together. Drag the slider to power off the device. Wait for 10 seconds, then turn it back on again.
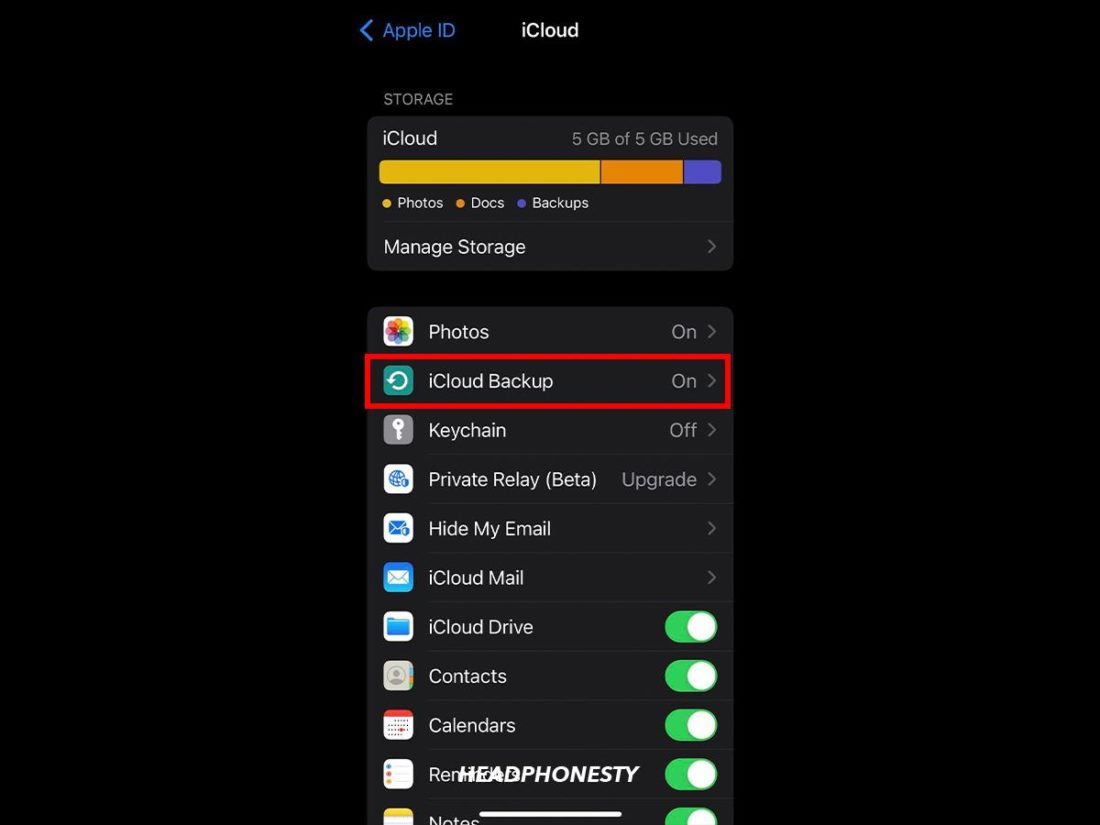
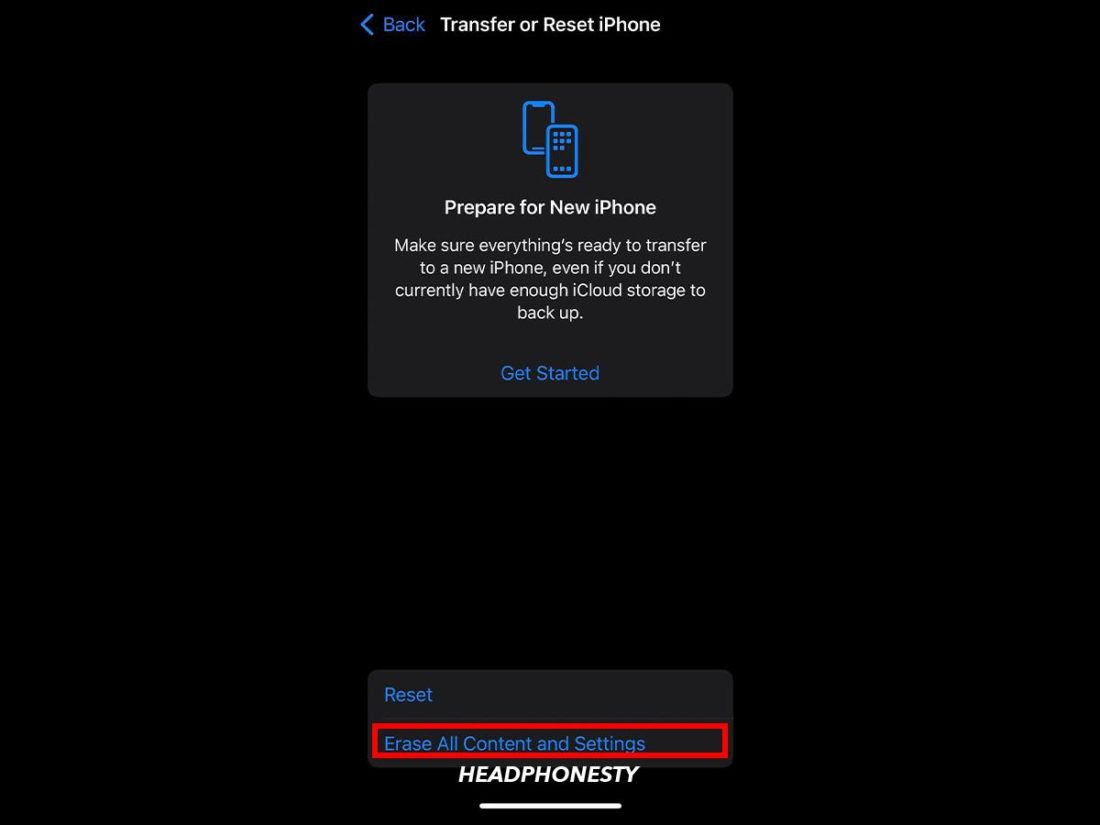
Reset your device settings
Sometimes, if your iOS device is sluggish, unresponsive, or not functioning correctly, it may be time for a reset. To perform an iCloud backup: Once you’ve performed a backup of your device, you can reset it with the following steps:
How to Fix Your Airpods When One Side Is Quieter: Alternative Tips
If you still find one of your AirPods sounding low despite trying the suggested solutions above, here are some other alternatives to consider:
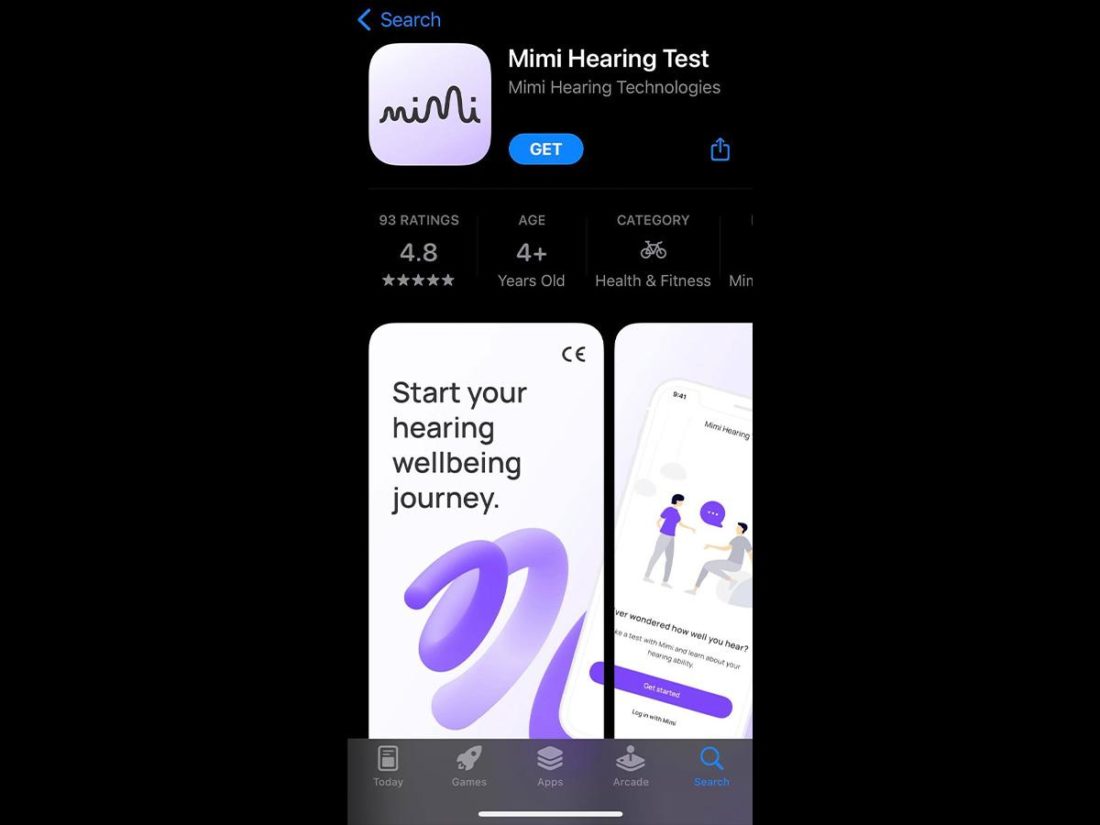
Check your hearing
You should first test your hearing to confirm there are no issues before troubleshooting the next possible cause. To do this, you can either use third-party apps, get help from your friend, or get an official diagnosis from a professional. Third-party apps such as the Mimi Hearing Test can help you quickly assess your hearing and accordingly recommend audio settings to help improve your listening experience. Alternatively, you can ask a friend to test your AirPods or connect their AirPods with your device. If they don’t hear anything unusual in both instances, you likely do have a hearing problem. If that’s the case, you may want to consult a hearing specialist such as an ENT professional, who can perform a comprehensive hearing examination to identify any underlying causes. Depending on the test results, you could opt to correct your hearing difficulties medically with hearing aids or implants. Or, if there’s an obstruction in your ear canal, such as a build-up of earwax, you can remove it safely at home or at the clinic, in severe cases.
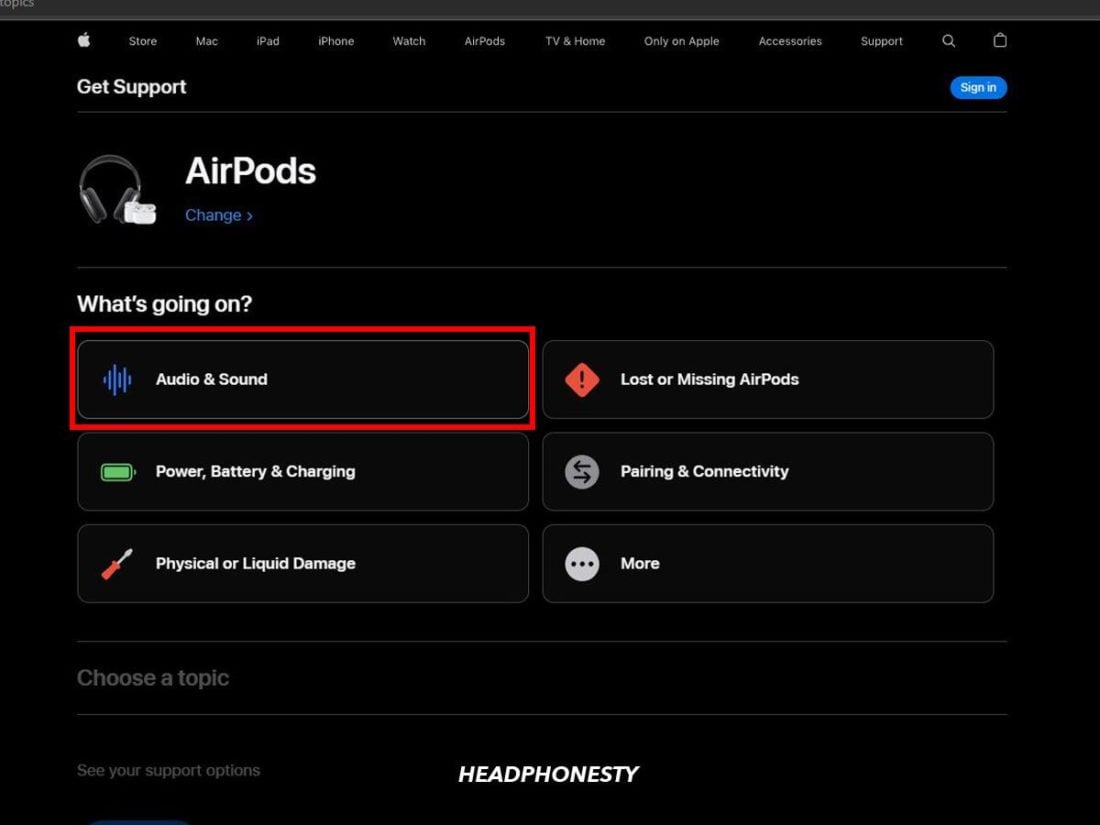
Contact Apple Support
When all else fails and you run out of ideas, there’s always Apple online support. You can contact Apple Support online via their website. Follow these steps: You may have to bring your AirPods to an Apple Authorized Service Provider near you or use their mail-in service to see if you qualify for a replacement. You can get your AirPods repaired or replaced for free if they’re still covered under Apple’s One Year Limited Warranty or AppleCare+. If not, you’ll need to pay an out-of-warranty service fee.
Conclusion
Whether your AirPods are brand new or have been in usage for some time, having one AirPod sound quieter than the other can be annoying if you don’t know how to detect and rectify the issue. Fortunately, you now have a range of solutions you can try to fix this problem of unbalanced audio. You may even be able to save your friends from unnecessary hassle, should they ever encounter the same problem. Which of the above fixes did you find the most useful? Did you discover any other solutions we might have missed in this guide? Do share it with us in the comments below!