What to Take Note Before Installing Windows 10 From a USB Drive
In today’s fast-paced interconnected world, almost everything is within reach. Even the latest version of the Windows 10 operating system is easily accessible if you know where to look. Nowadays, people can save the system installer in a USB drive and lend it to others for use. However, if you wish to clean install Windows 10 on your desktop or laptop computer, there are some things you must take note of first.
What You Need
As with any endeavor, there are a few items you must prepare before beginning. Some people might think that installing Windows 10 from a USB drive will only need two things: the Windows 10 installer and a USB. However, there are a couple of other things that this process will require. The next thing you will need is a Windows 10 instal.iso file. This is what will allow you to install the Windows 10 operating system on your desktop or laptop computer. Of course, it goes without saying that you will need a computer where you will install Windows 10. Typically, this is a new computer that does not have an operating system yet. Other than a new computer, though, you will also need a separate, working computer. This is what you will use to format the USB flash drive. In other words, you will need two computers for this process — one for formatting the USB drive and the other is the main destination for the installation. Finally, you will need a USB formatting tool or software. This is the program that will allow you to format the USB drive, which is an integral part of the entire procedure. You can use the formatting program you are most comfortable with.
How Long Does It Take to Install?
At this point, you might be wondering how much time you need to allocate for the installation. Would a couple of hours suffice, or will it take an entire afternoon? The answer will actually vary. There is no all-encompassing timeframe that universally applies to everyone. The process can vary from computer to computer and person to person, depending on a few factors. Device configuration plays a key role in determining the amount of time it will take to install Windows 10. Since the process involves formatting the USB drive, it will also depend on how long this part will take. The formatting tool you choose can significantly affect the timeframe. If you choose a good tool, it will only take minutes. However, if an unreliable tool can take hours off your day. The installation process itself also has no fixed timeframe. If you have an older computer with slower settings, the process will naturally take longer. On the other hand, you will not have to wait too long if you have a relatively newer computer with the latest specs. Generally, though, the entire process can take anywhere from 10 minutes to three hours. Because of the volatile nature of the timeframe, it is a good idea for you to set aside a day in your schedule for this process. That way, you still have time to spare if anything goes wrong midway through. Furthermore, you will not feel pressured to complete the installation process in just a short amount of time. Working on a time crunch will just make you feel stressed out.
The Dos and Don’ts
If you want to learn how to install Windows 10 from USB drives properly, you must learn about the handful of things you can and can’t do. By arming yourself with this knowledge, you can avoid potential disasters and seamlessly install a new operating system on your computer. Here are the dos and don’ts of installing Windows 10 from a USB:
DON’T: Use an Untrusted Computer
As mentioned earlier, you will need two separate computers to complete the installation process — one for formatting the flash drive and the other as the destination computer. However, computers can harm other computers by transferring viruses. Therefore, you must be careful about the computer you choose to format your USB drive. Never use a computer you don’t trust. It’s best not to borrow a friend’s computer or format your USB drive using a computer from an internet cafe. Even though these computers may not have viruses, you should treat them as if they were infected. Remember that your USB drive can carry viruses from one computer to another. If you happen to stick it into an infected computer and then use it to install Windows 10 on your new computer, your new computer will become virus-ridden as well. Additionally, it’s better to assume that everything you do on a computer is tracked and logged. As such, stay away from public computers that might steal your information. We’re living in a world that’s highly reliant on technology. Unfortunately, that same technology can also end up betraying us in the end.
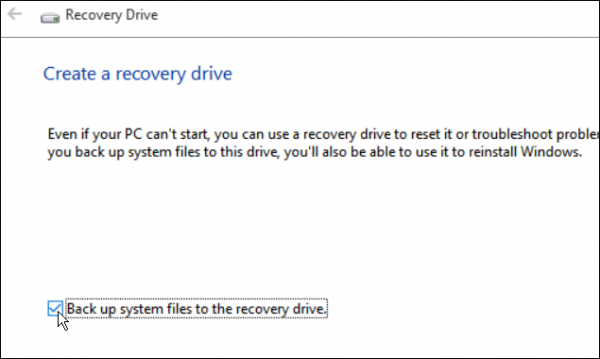
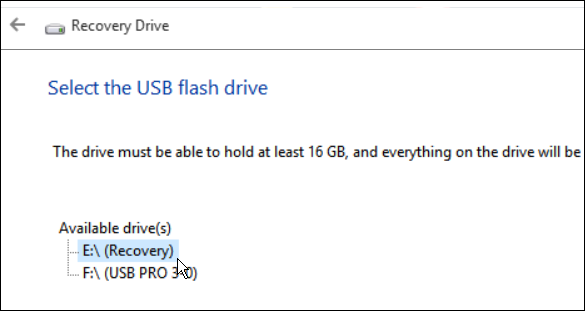
DO: Create a Recovery Drive
Although computers have come a long way since they were first invented, they can still fail every now and then. Your Windows 10 operating system may work like a well-oiled machine right now, but that doesn’t mean it’s immune to failure. A recovery drive simply provides you with a backup solution. To create a recovery drive, you will need a separate USB flash drive. You should have at least 16 GB of free storage space in that drive for the recovery program as well as the Windows installation files. Microsoft recommends using an empty USB drive, too, because this process will remove the files already in the drive. Here are the instructions on how to create a recovery drive:
DON’T: Forget To Configure Windows Updates
It’s important to configure Windows updates after installing Windows 10 on your computer so that you always run on the latest version of the operating system. Microsoft has since made it easy to do this, though, with Windows 10 automatically updating your system so that security patches and bug fixes always install on their own. However, you might find that Windows can interrupt your work with an automatic update. Some updates can even interfere with the functionality of an app or program you use constantly. Fortunately, this kind of interruption doesn’t happen often. Still, you probably want Windows to adjust to your schedule when making its updates. Additionally, you may want to wait a while before going with the updates. This way, you can check whether or not the new update affects an app or program you heavily use. If it does, then you can put off the update for a few days or weeks until Microsoft fixes the issue. Here is how you can prevent Windows 10 from automatically installing updates: Keep in mind that you can only select up to a window of 18 hours for your active hours. During this time, Windows 10 will not automatically install updates or restart your computer.
DO: Make Use of Bitlocker Drive Encryption
Encryption is the name of the game when it comes to protecting your personal information. You naturally want to make sure your data remains secure and private. This makes sure that your data are for your eyes only, even if your computer gets stolen. This process allows you to encrypt your data with a key that can’t be cracked. You will need a Trusted Platform Module (TPM) chip as well as Windows Business Edition to perform BitLocker encryption, though. Simply run the BitLocker Encryption Wizard to start. Make sure to check for compatibility, too. Afterward, just open File Explorer and select This PC. Right-click on your system drive, which is drive C in most cases, and then select “Turn on BitLocker.” If you have Windows 10 Home instead of the Business Edition, you can still encrypt your device, though you will need to sign in with your Microsoft account. This type of encryption is rather basic, though, and only encrypts the system drive’s contents. This leaves your secondary drives unprotected and prime for picking.
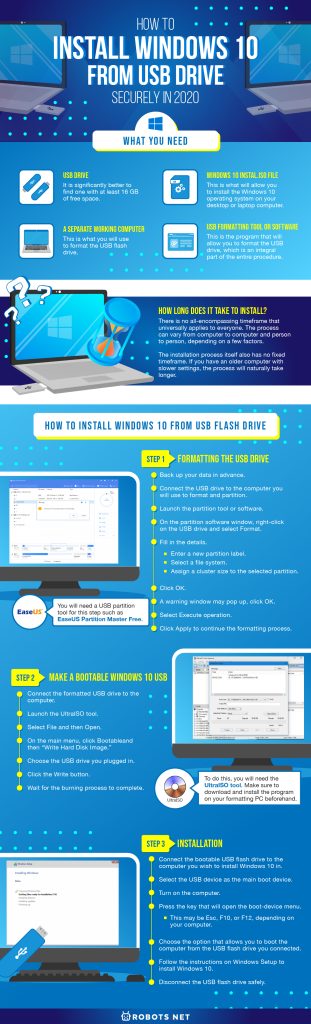
How To Install Windows 10 From USB Flash Drive
After jumping through all the hoops and preparing everything you need, here comes the most crucial part — actually installing Windows 10 from a USB drive. The process isn’t very hard, especially if you follow the instructions properly. It might take some time, as previously stated, so it’s best to allocate an entire morning, afternoon, or evening for the installation. This way, you’re not operating with a deadline. Furthermore, you won’t accidentally take some missteps because of rushing the process. Here is how to install Windows 10 from a USB drive:
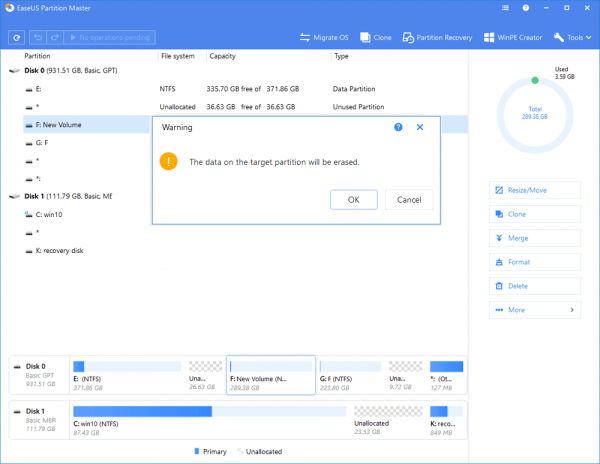
Step 1: Formatting the USB Drive
The first step consists of formatting and partitioning the USB flash drive. You will need a USB partition tool for this step such as EaseUS Partition Master Free. Install the partition tool on a separate computer, ideally not on the machine where you will be installing Windows 10. Then, follow the instructions below:
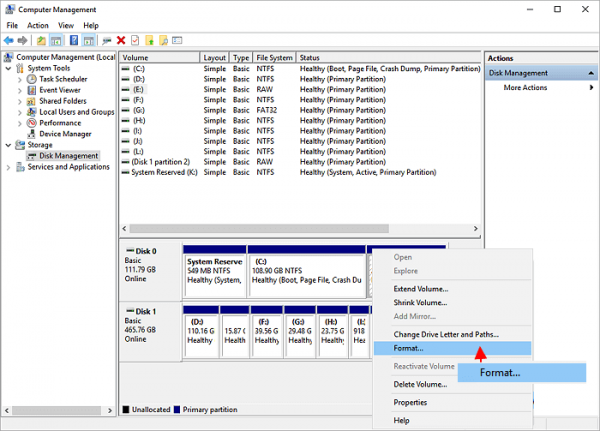
Alternative Formatting Option
You can also format your USB flash drive without the help of a partition tool like EaseUS Partition Master Free. To do this, follow the steps below:
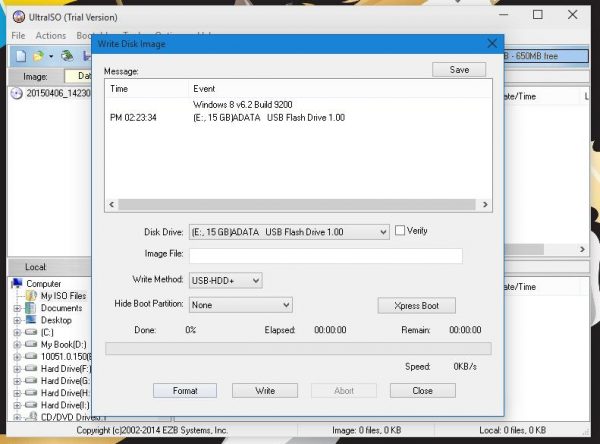
Step 2: Make A Bootable Windows 10 USB
The next step is to create a Windows 10 installation tool in your USB flash drive. To do this, you will need the UltraISO tool. Make sure to download and install the program on your formatting PC beforehand. After doing this, follow the instructions below:
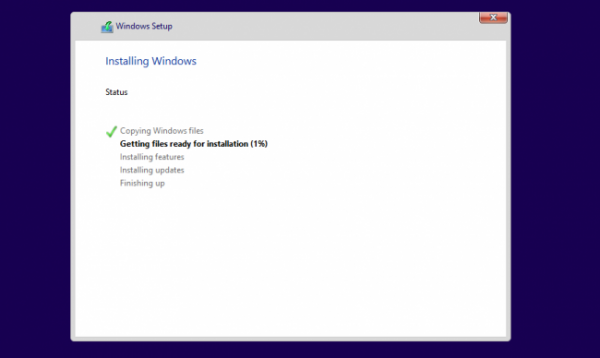
Step 3: Installation
The final step in the process is the installation proper. You now have your USB flash drive which contains the Windows 10 operating system. Here is how to install Windows 10 from a USB drive:
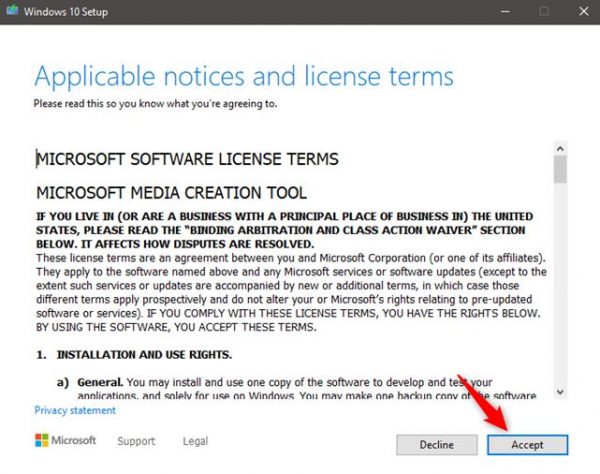
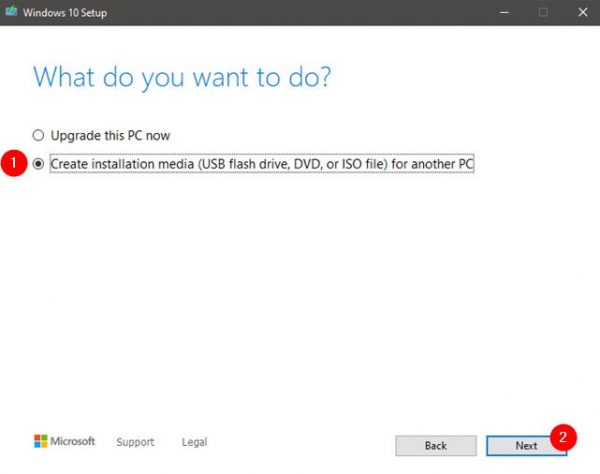
Alternative: Windows Media Creation Tool
There is also a way to install Windows 10 on your computer with a USB drive using the Windows Media Creation Tool. You will need to download and install the tool on the second computer first, though. Once you have it, perform the following steps: After these steps, perform the following steps on the new computer where you want to install Windows 10 on:
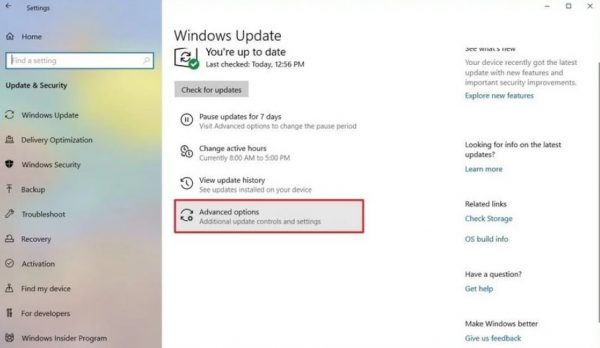
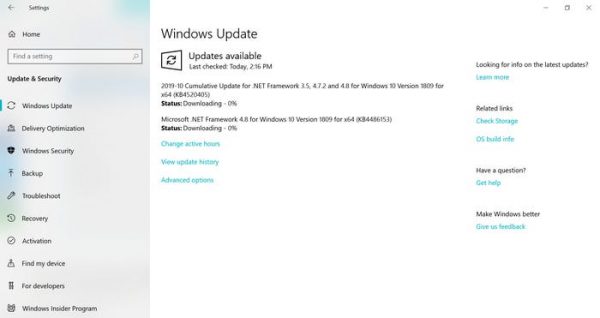
Checking For Windows Updates
The installation process may have finished, but it doesn’t stop there. After completing either one of the two options, make sure you check for Windows updates. In doing so, you can ensure your computer runs on the latest version of the Windows 10 operating system. To check for Windows Updates, perform the steps below:
The Bottom Line
As you can see, installing Windows 10 on a new computer isn’t all too difficult. Now that you know how to install Windows 10 from a USB drive, you can do so on your computer. You can even do it for a friend or on an old computer of yours that’s compatible with the operating system. As long as you know what to do, have the proper tools and equipment, you can easily perform the installation process without hassle.